
Fall Ombré Nails: 8 Color Combos That Actually Work (aka: won’t look like swamp fingers)
If picking fall ombré nail colors makes you feel like you’re standing in the polish aisle having a tiny identity crisis… hi. Same.
The good news is fall colors are basically built for ombré. Browns, wines, rusts, olives these shades want to melt into each other. Even when your blend isn’t “salon perfect,” it reads as moody and intentional instead of “I sneezed mid-manicure.”
So here are 8 fall ombré combos that consistently look good, plus my no drama tips for avoiding muddy gradients, choosing shades for your undertone, and doing it via salon, press ons, or a quick DIY when you’ve got 20 minutes and questionable patience.
8 fall ombré nail combos I’d bet real money on
1) Burnt Orange → Nude
This is the “sunset, but make it wearable” combo. Burnt orange near the cuticle fading into a soft nude tip looks good on basically everyone, and it goes with denim, knits, and every latte you’ll pretend is “just a little treat.”
If you only try one, make it this one.
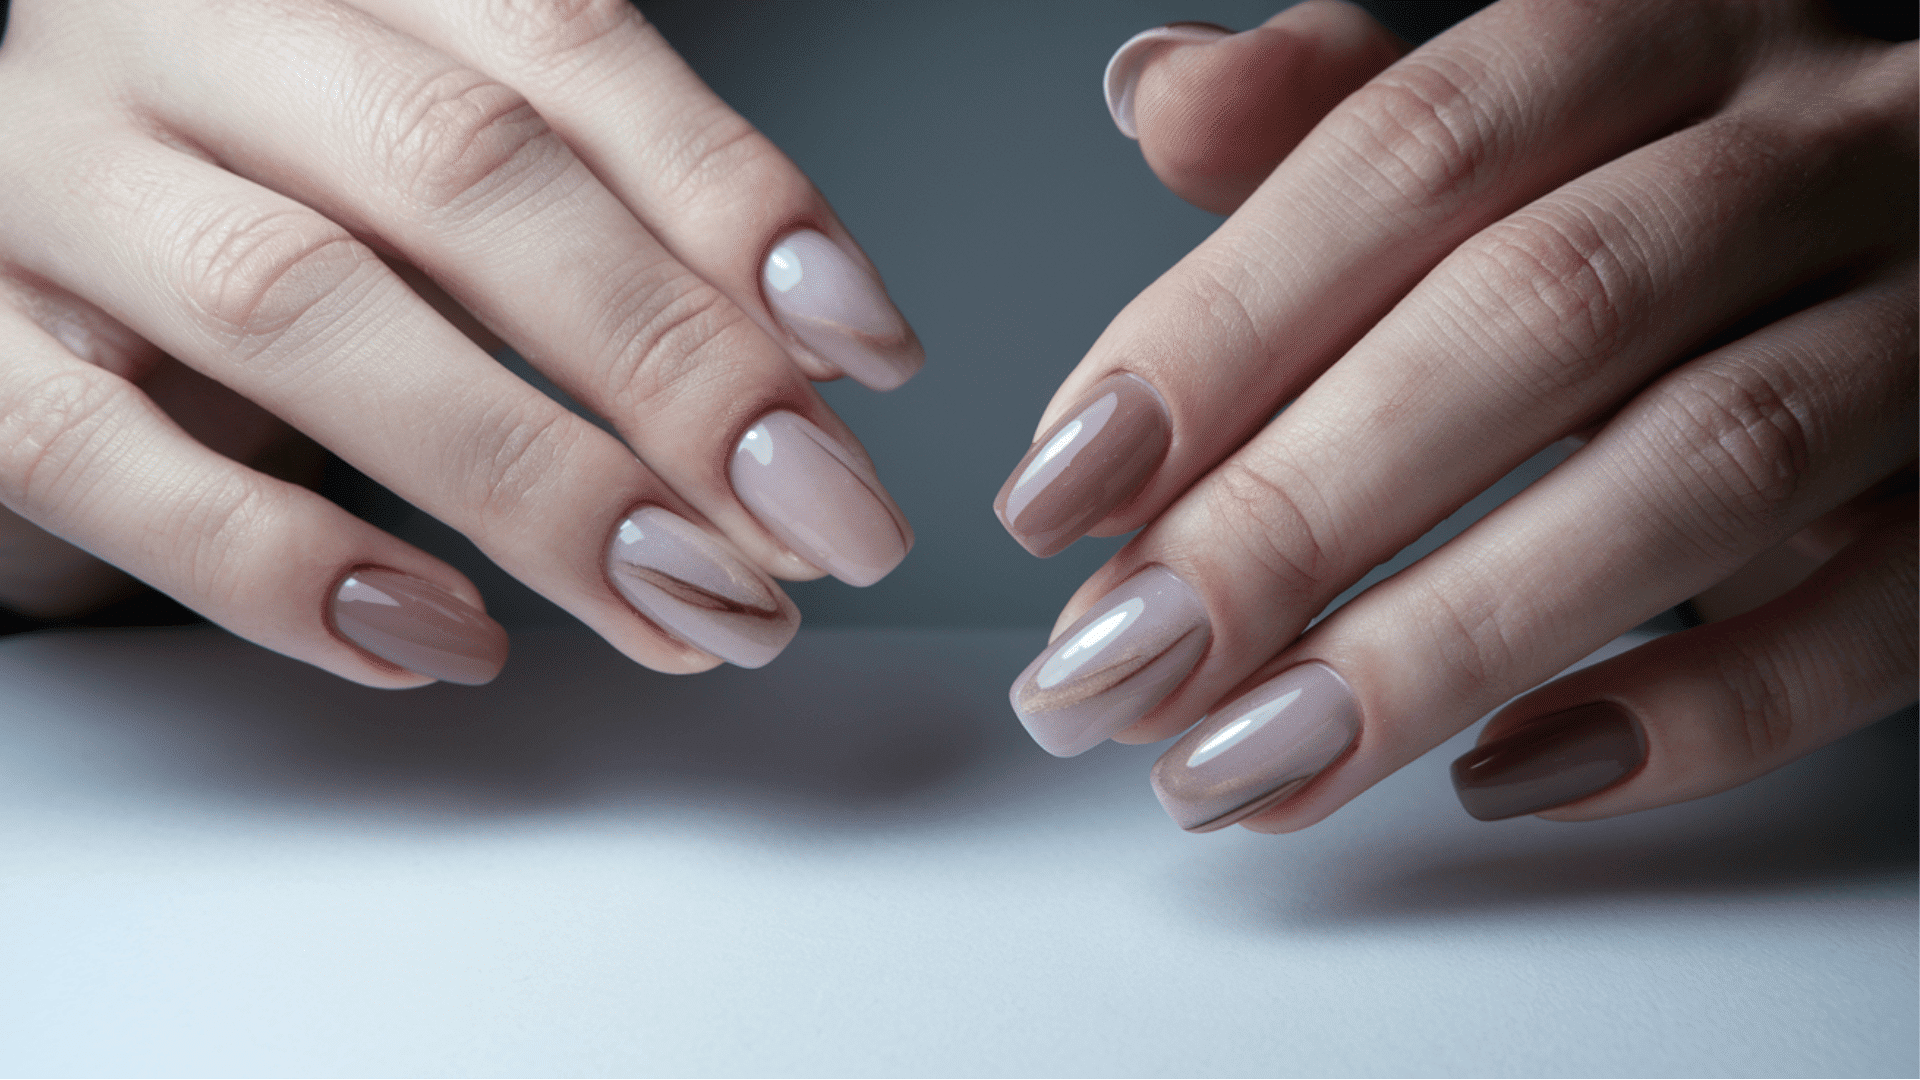
2) Caramel → Chocolate
Caramel blending into deep chocolate brown is peak cozy season. Also: because both shades live in the same brown family, your fade doesn’t have to be flawless. Little patchy spots just look like “dimension,” and I support that narrative.
3) Rust Red → Amber
This one has main character energy. Rust at the base into a warm amber glow at the tips is bold without needing any extra nail art. Perfect for longer nails, but it still looks great on medium lengths if you want drama without going full villain.
4) Deep Wine → Burgundy
If fall were a manicure, it might be this. Deep wine fading into burgundy looks expensive and a little mysterious like you definitely own a wool coat you didn’t buy on sale (even if you did).
Glossy = rich and juicy.
Matte = modern and slightly dangerous.
5) Cozy Beige → Mocha
This is for the “I want fall nails but I also have meetings and can’t be explaining my manicure” crowd. Beige into mocha is soft, warm, and unbelievably office friendly. It’s basically the manicure version of a cashmere sweater.
6) Olive Green → Gold Shimmer
When you’re bored of orange and brown (valid), olive into gold is such a pretty switch up. Olive keeps it earthy, gold adds light catching magic.
One note: keep the olive clean and intentional muddy olive is a slippery slope into “did I paint my nails with pea soup?”
7) Plum → Lavender (or Mauve)
This is the romantic fall option. Plum into lavender/mauve feels moody without going full goth. It’s especially cute for fall evenings when you want something different than yet another brown nail.
8) Navy → Charcoal Gray
Cool toned, sleek, and weirdly chic. This combo feels like a crisp jacket and good lighting. If warm autumn shades aren’t your thing, navy into charcoal still feels seasonal without forcing pumpkin spice on your fingertips.
If your ombré looks muddy, it’s usually one of these issues
1) Your colors are “fighting” each other
Here’s my low effort rule: pick shades that sit close together on the color wheel or stay in the same family.
- Easy wins: monochrome fades (beige → mocha → espresso), adjacent tones (rust → amber), or same vibe shades (plum → mauve → lavender).
- Common mud makers: big opposites smashed together (like orange + green) unless you really know what you’re doing.
If you’re desperate for a tricky combo, cheat: use three shades instead of two so there’s a smooth “bridge” color in the middle.
2) You put the light color near your cuticle
Try flipping it: darkest near the cuticle, lighter toward the tip. Dark recedes, light pops forward, and your nails look longer. It’s like contouring, but for your hands (and with less emotional damage).
Quick “pick your best match” cheat sheet (undertone + vibe)
If you’re not sure about undertones, look at your wrist veins in natural light:
- Greenish veins = warm
- Blue/purplish veins = cool
- A little of both = neutral (you lucky gremlin)
If you run warm
Go for: burnt orange → nude, caramel → chocolate, rust → amber, beige → mocha. Warm undertones and warm fades are besties.
If you run cool
Go for: deep wine → burgundy, plum → lavender, navy → charcoal. Cool fades look crisp and expensive on cooler skin tones.
If you’re neutral
You can wear basically all of them (respectfully, I’m jealous). Start with beige → mocha or caramel → chocolate, then branch out when you’re feeling spicy.
Finish matters more than people admit
- Glossy: makes warm shades look richer (caramel/chocolate looks chef’s kiss).
- Matte: modern, forgiving, and hides minor blending chaos.
- Metallic/chrome: best when one shade is intentionally shimmery like olive → gold.
Press ons are good now. Like, suspiciously good.
If you haven’t tried press ons since the early 2000s (same), just know they’ve had a glow up. With decent prep, many sets last 7-14 days.
A few fall-ish options people actually like:
- Glamnetic Candy Corn (warm orange gradient, short friendly)
- Glamnetic Eclipse (taupe to lavender, cooler vibe)
- Olive & June BP Ombré (minimal, everyday easy)
- Kiss imPRESS Take A Chance (drugstore grab and go)
My opinion: if you want perfect ombré with zero effort, press ons are the cheat code. No shame in that game.
DIY fall ombré nails (the easiest version that won’t ruin your night)
If you want to paint them yourself, do the quick sponge gradient method. It’s the least fussy for beginners and still looks legit.
What you need
- Makeup wedge sponge (the cheap triangle kind)
- 2-3 polish shades (light → dark)
- Base coat + top coat
- Small brush + pure acetone for cleanup (or a cotton swab if you’re living on the edge)
The quick steps
- Base coat, fully dry (don’t rush this wet base coat = chaos).
- Paint your lightest shade on the whole nail.
- On the sponge, paint stripes of your colors with a little overlap.
- Lightly dampen the sponge first so it doesn’t drink all your polish.
- Dab, don’t drag onto the nail. Repeat 2-3 times to build the fade.
- Clean edges with acetone, then seal with top coat (this also smooths the gradient).
Tiny pro tip: dark fall shades (burgundy, brown, rust) behave better in thin layers. Thick coats get streaky and weird fast.
Press ons vs salon ombré: the honest answer
A good salon ombré is gorgeous and custom, but it costs more and takes time. Press ons can look shockingly close for way less money your trade off is you’re choosing from pre-made fades instead of building your exact dream combo.
For everyday life? Press ons win on convenience. For a big event or if you’re picky picky? Salon.
Your nails deserve a little fall outfit too
Pick one seasonal ombré nail look, commit for a week, and see how you feel. Worst case, you hate it and switch it out this is nail polish, not a tattoo.
And if your first DIY ombré looks a little… “rusty pumpkin smudge situation”? Congratulations, you’ve made art. Put on top coat and walk away like you meant it.