

Many assume that transitioning to grey hair is simply about letting roots grow out or applying one uniform color.
In reality, the challenge lies in blending growing grey with existing dyed hair without creating stark lines.
Transitioning to grey hair with highlights offers a nuanced solution, but timing, technique, and base color all influence the outcome.
Salons often see clients frustrated after a single session when regrowth contrasts sharply with previous color, highlighting the need for a gradual approach.
Not every hair type or grey pattern responds the same way, and patience is part of the process. Understanding these subtleties sets the stage for a smoother transition.
Why Use Highlights for Grey
Transitioning to grey hair with highlights is the easiest way to soften the line where grey roots meet dyed hair. Highlights break up contrast and make the blend look natural from the very first session.
Layering multiple tones tricks the eye, blending grey and color instead of showing a harsh edge. Without highlights, roots are obvious, or lifting to blonde too early makes grey stand out more.
You don’t need to wait until hair is mostly grey to start. Early highlights integrate the grey sooner and keep maintenance low.
The right technique depends on the contrast between your existing color and grey, not personal style preference. Choosing correctly ensures a smooth, manageable transition every step of the way.
Grey Transition Techniques
Transitioning to grey hair with highlights requires the right technique for your grey percentage, color contrast, and growth rate. Not all highlights work the same, so knowing each method ensures a smooth, low-maintenance transition.
1. Babylights
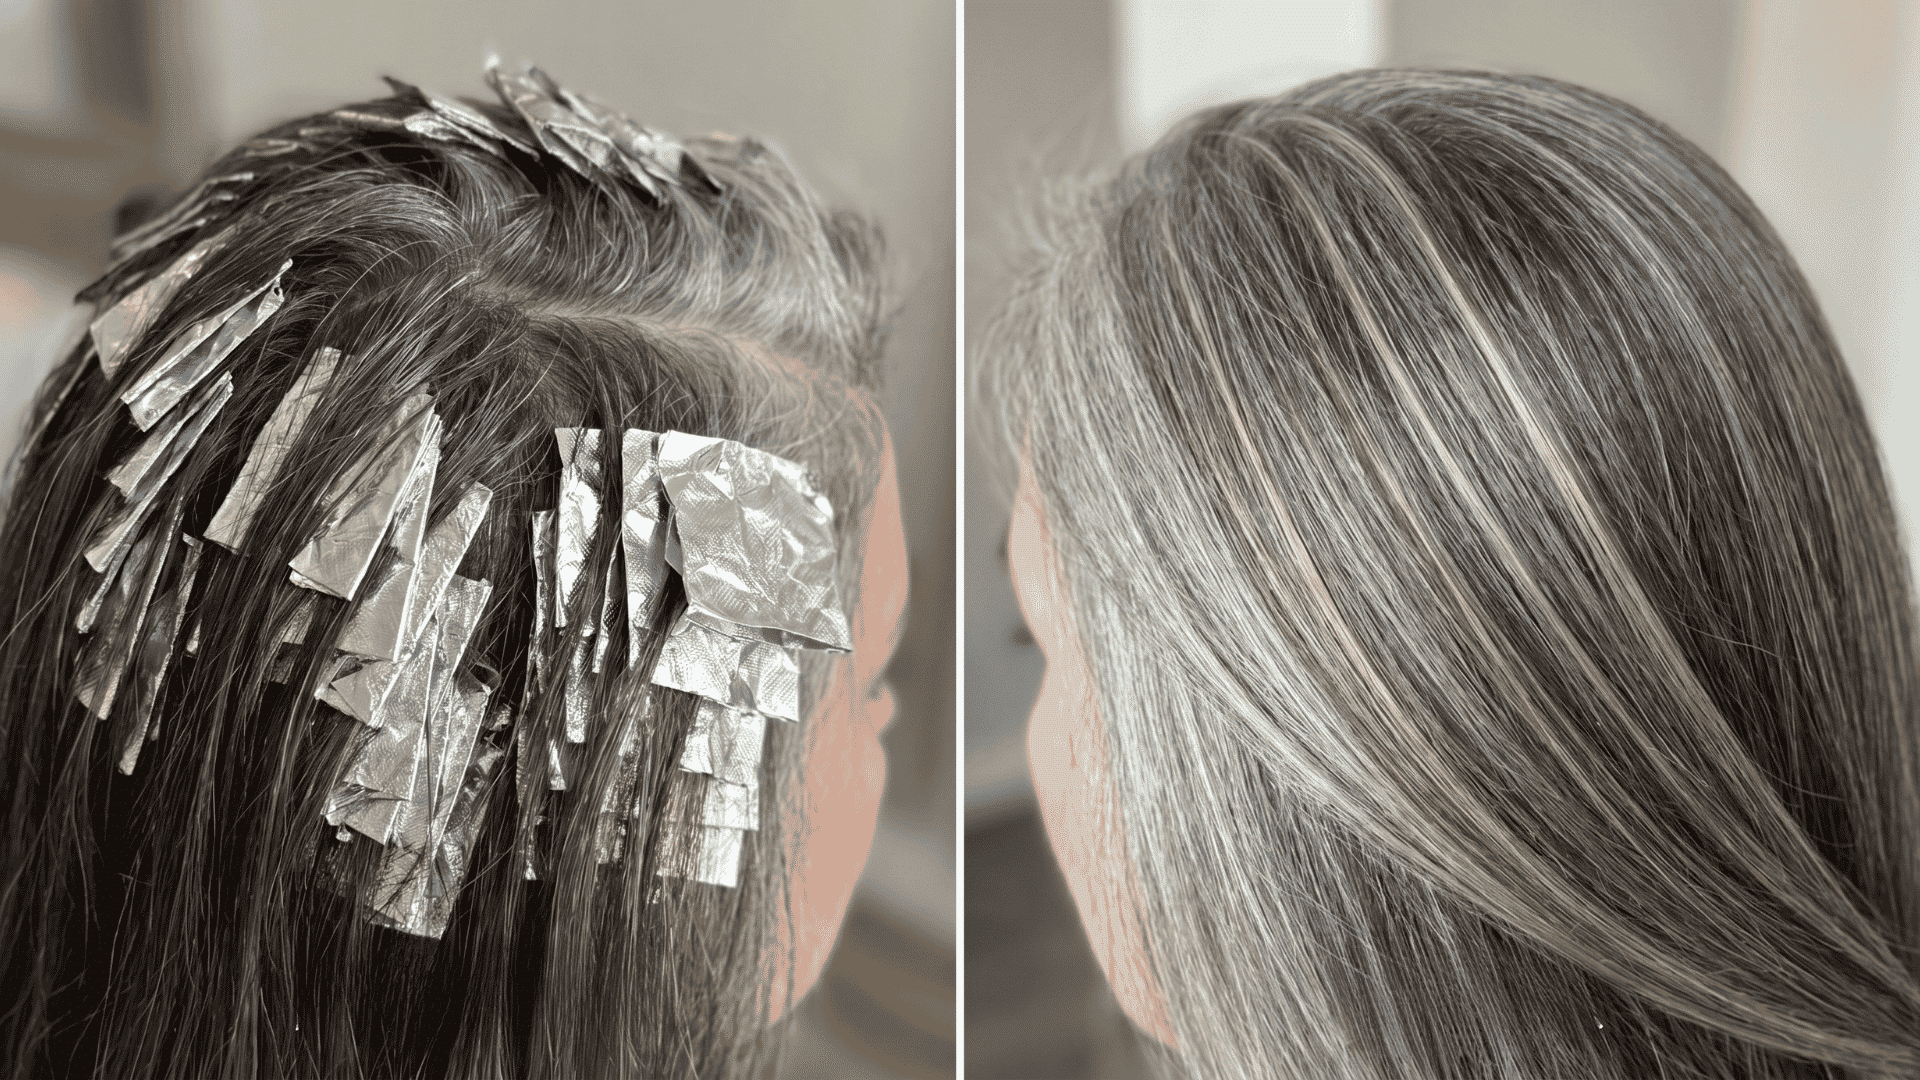
Babylights are tiny foil sections placed close together at the roots and hairline. This frequent placement creates enough tonal variation to blur grey and color, giving a smooth, natural blend.
They work best for fine or dense root grey and low-contrast bases. Professional application is recommended to prevent uneven placement or over-processing.
2. Balayage and Teasylights
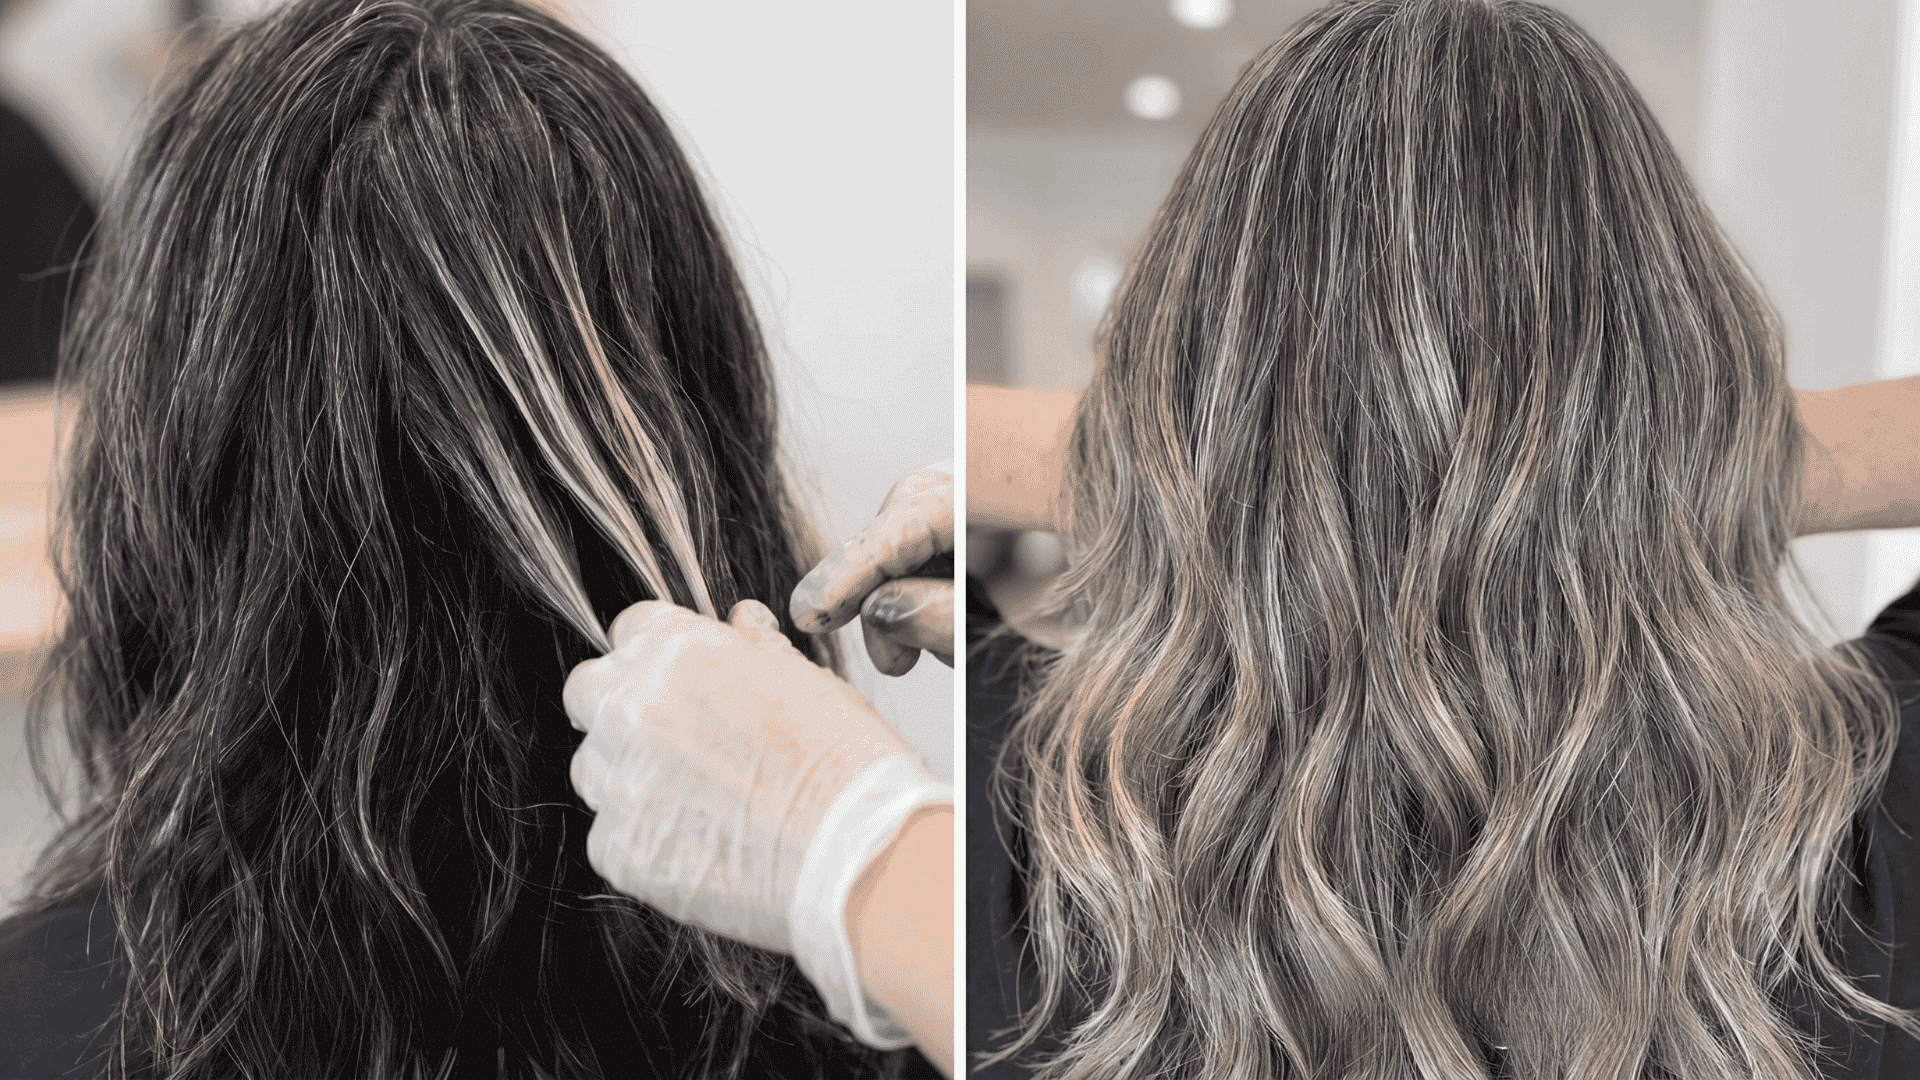
Balayage and teasylights are hand-painted streaks through the mid-lengths. They spread tonal variation across a wider area, softening the transition and preventing visible grey patches.
These techniques are ideal for scattered mid-length grey, not dense roots. Salon skill ensures even application, though minor at-home touch-ups are possible.
3. Root Smudge and Shadow Toning
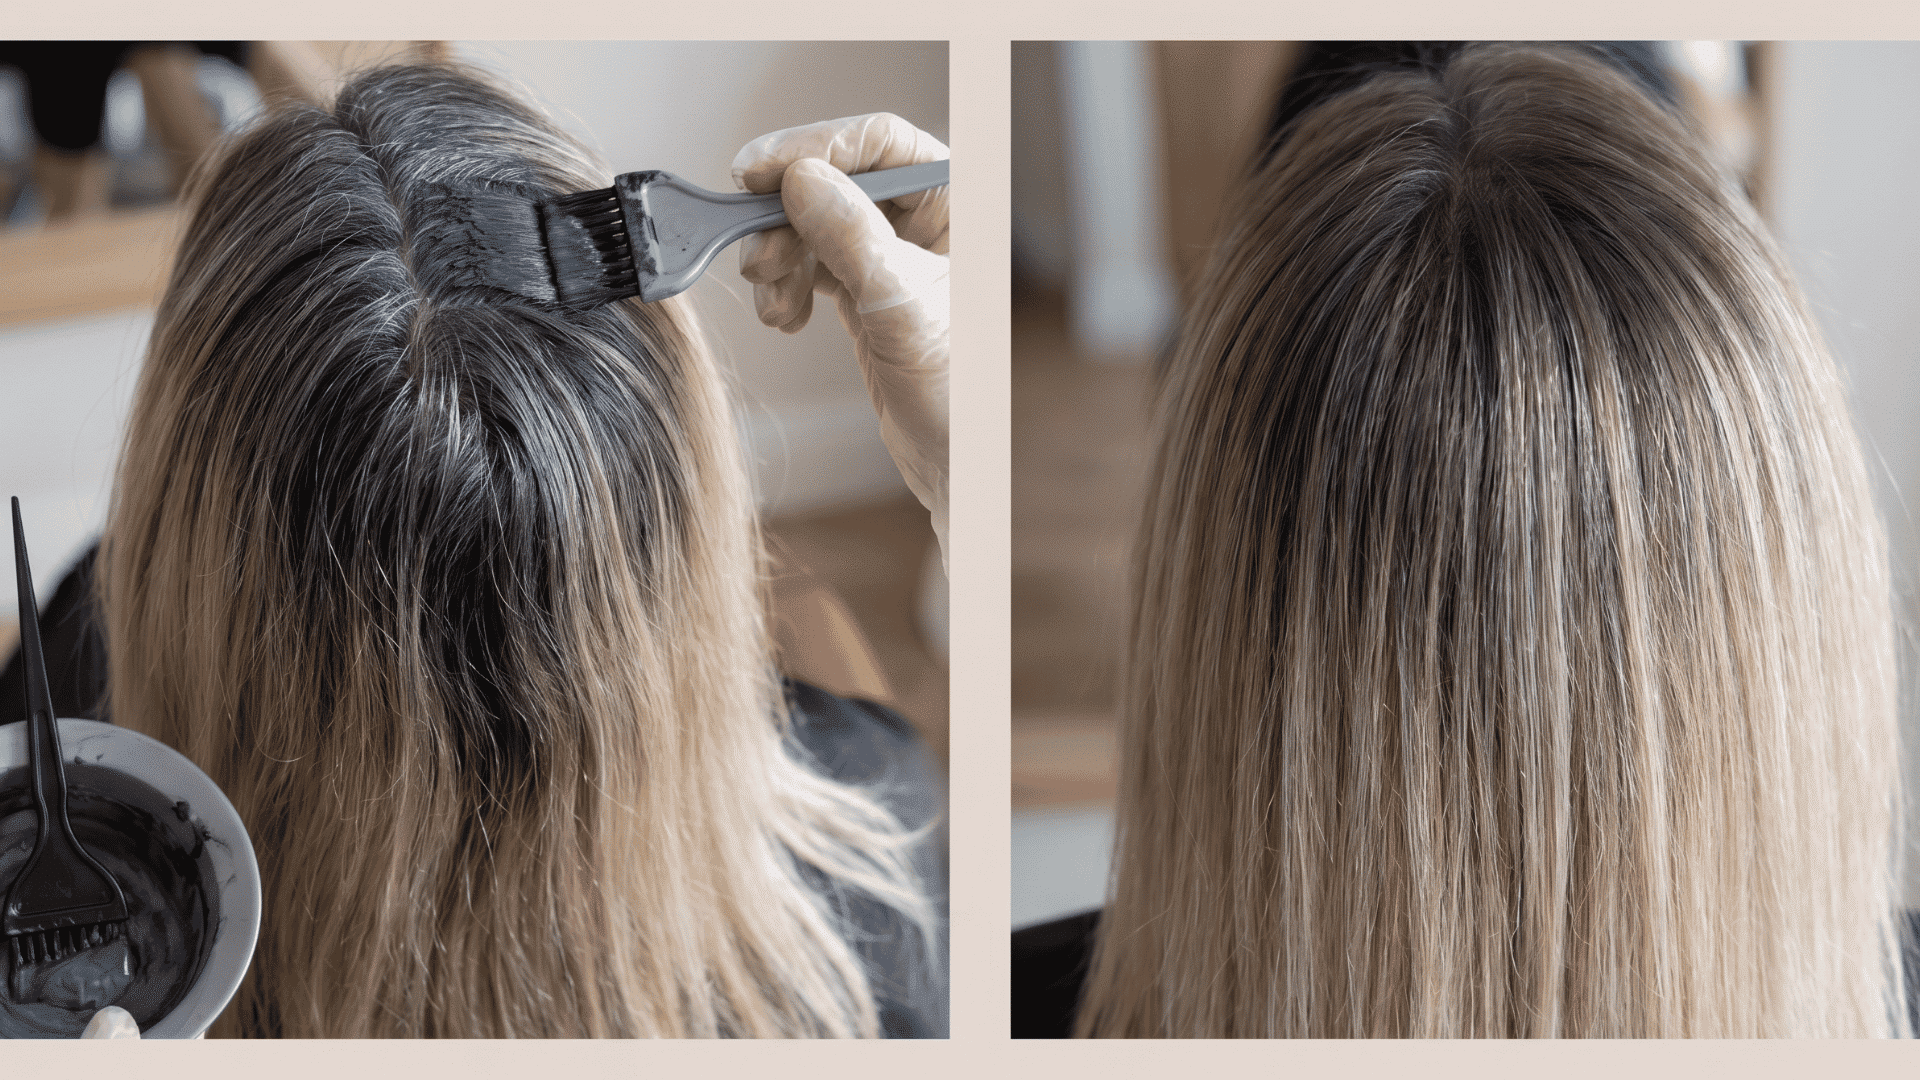
Root smudge and shadow toning use demi-permanent toner at the root line. They mimic natural root depth, blending grey without adding lift and softening harsh lines.
This approach extends the time between foil appointments. Full application is professional, though at-home toners can maintain results in between sessions.
4. French Blending
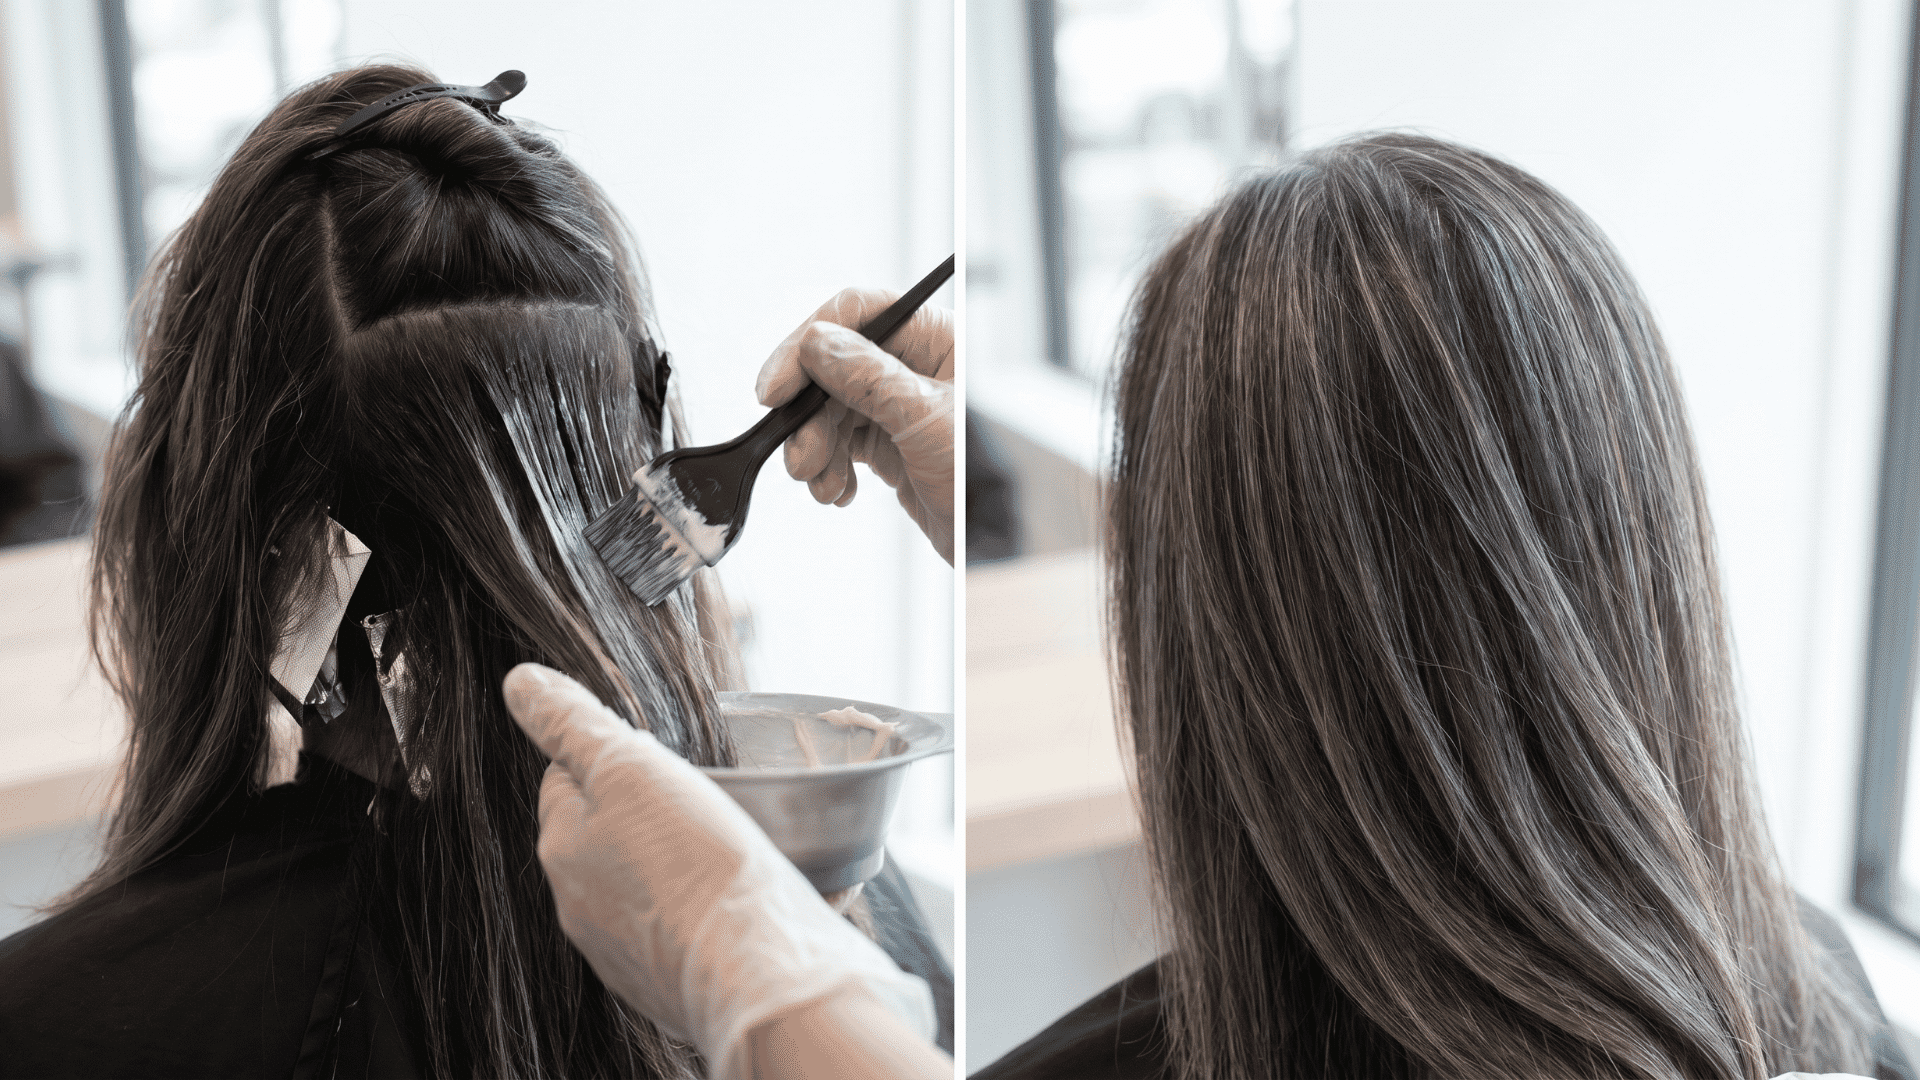
French blending deposits lowlights with low-volume developer to control contrast gently. It adds dimension while keeping base hair intact, slowing the visual progression of grey.
This is perfect for moderate grey or those who want a gradual, low-impact transition. Professional placement is recommended for precise and even results.
The Grey Transition Process
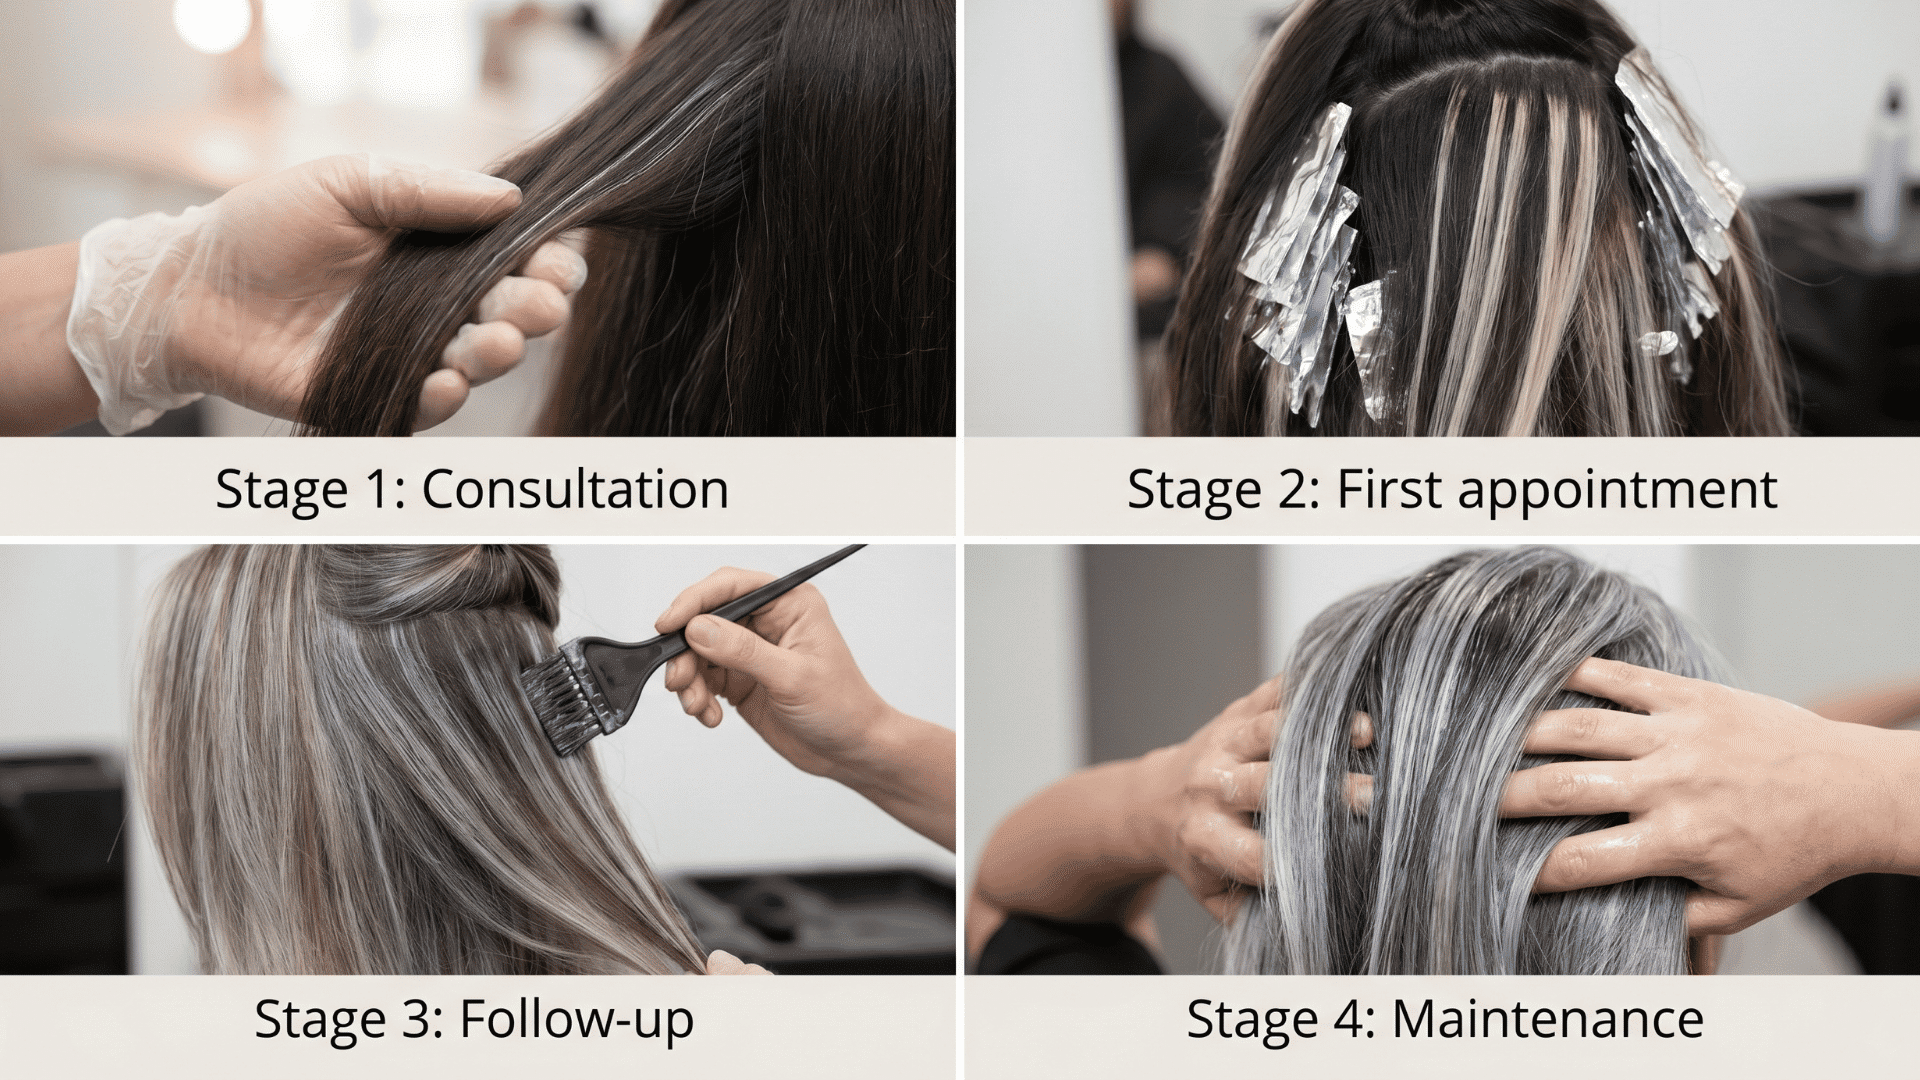
Transitioning to grey is a progression, not a single appointment. Each session builds on the last, gradually blending grey into dyed hair for a natural look.
Stage 1: Consultation and Base Assessment
The consultation sets the plan for the entire process. The stylist evaluates grey percentage, distribution, dye depth, hair condition, and growth rate to choose the right techniques.
Clients should bring photos of natural grey growth and realistic timing expectations. This step corrects the misconception that a consultation is just “telling the stylist what you want.”
Stage 2: The First Appointment (Breaking Up the Base)
The first appointment introduces tonal variation to soften the root line. Babylights, balayage, or a combination is applied based on the initial assessment.
Root smudge or shadow toning mimics natural root depth, and toner aligns all lightened sections. On dark bases, the hair won’t look finished; setting expectations early prevents frustration.
Stage 3: Appointments 2 Through 4 (Building the Blend)
Follow-up appointments lighten hair slightly toward the target tone and adjust lowlights for dimension.
New grey growth is incorporated progressively, becoming part of the tonal blend rather than being hidden.
By the third or fourth session, grey often starts doing the work that early highlights needed bleach to achieve. Intervals typically start at 8–10 weeks, extending to 12–16 weeks as the blend matures.
Stage 4: The Maintenance Phase (When the Transition Is Complete)
The transition is complete when grey and highlights are tonally coherent without heavy intervention. Salon appointments shift from blending to refreshing, with toner and gloss replacing foils.
Frequency drops to 3–4 visits per year for many clients, and at-home toning becomes the main maintenance tool. Proper staging early means less work later and a smooth, natural-looking grey blend.
How Your Natural Base Color Changes the Plan
Your natural base color determines the contrast with grey. This guides which technique works best for a smooth transition.
| Base Color | Approach | Why It Works |
|---|---|---|
| Blonde / Light Brown | Ash, pearl, or platinum highlights | Low contrast, blends almost invisibly, easy grow-out |
| Brunette / Dark | Babylights + lowlights | Bridges high contrast, prevents harsh lines, and avoids maintenance cascade |
| Red | Copper, auburn, or strawberry highlights | Maintains warmth, grey looks intentional, avoids flat ashy results |
Maintaining Your Transition Between Appointments
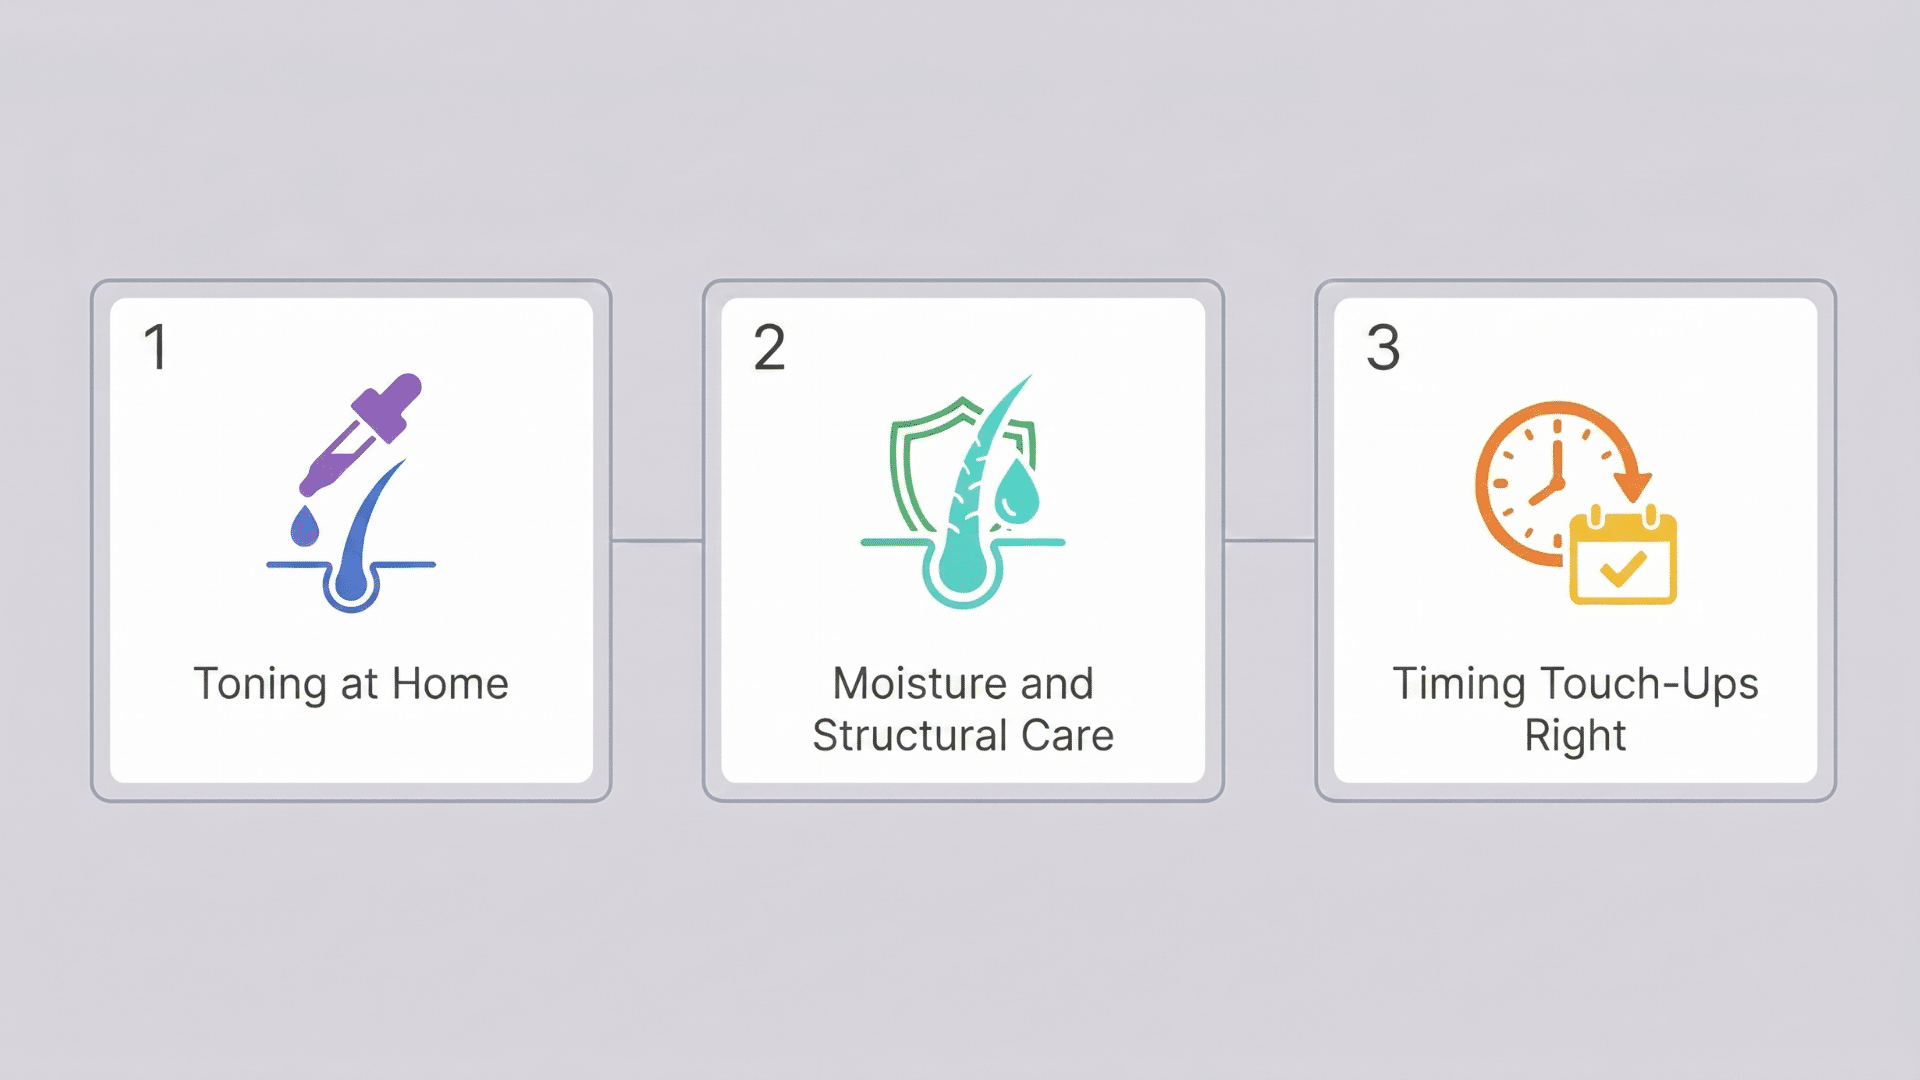
Grey transition highlights need a targeted at-home routine because grey hair behaves differently. Without natural pigment, highlighted grey shifts tone faster, and brass develops quickly, so maintenance is essential.
1. Toning at Home: Purple Shampoo v/s Toning Mask
Use purple shampoo once a week to keep minor brass from building up. When brass is already visible, apply a toning mask every 2–3 weeks for stronger correction.
Always pick cool-toned products because grey hair shows warmth immediately. Keeping a consistent toning routine helps extend the time between salon visits.
2. Moisture and Structural Care
Deep condition your hair weekly to replace lost moisture and strengthen strands. Use heat protectant every time you style, because grey and highlighted hair is more porous and fragile.
Bleached sections and grey hair lose moisture faster, making texture damage more visible. Even with the correct color, damaged hair undermines the smooth, blended look of the transition.
3. Timing Touch-Ups Right
Start appointments every 8–10 weeks, gradually lengthening to 12–16 weeks as the blend matures. If visits become more frequent, the hair is likely being over-processed or lifted too aggressively.
Root smudge treatments between foil sessions can extend intervals without visible regrowth.
Proper timing keeps the grey blend seamless and low-maintenance over time.
Where the Transition Goes Wrong
Even with proper planning, grey transition highlights can go off-track when technique, toner choice, or maintenance routines are not handled carefully, leading to uneven and high-maintenance results.
- Over-highlighting creates pale base and uneven regrowth contrast.
- Sparse highlights leave harsh grey-to-color separation visible clearly.
- Wrong toner choice causes warm brassiness and unwanted tones.
- Skipped moisture care leads to breakage and uneven blending overall.
Changing stylists mid-transition can also disrupt results. A new stylist may not match the previous toning formula, which creates inconsistent color patches across the hair.
What is the Difference Between Gray Blending and Highlights?
Both aim to soften the shift into grey, but they work in opposite directions: gray blending deposits color to reduce contrast, while highlights remove color to introduce lightness. Knowing which one you actually need keeps the transition from stalling or turning brassy.
| Aspect | Gray Blending | Highlights |
|---|---|---|
| Main goal | Merge grey into your base so lines disappear | Add lighter strands to mimic grey’s brightness |
| What it does to hair | Deposits tone, no lifting | Lifts and lightens selected strands |
| Products used | Demi-permanent toners, lowlights, glosses | Lightener with foils or hand-painting |
| Best when | Grey is still sparse or you want minimal change | You need extra lightness to match denser grey |
| Upkeep | Lower; refreshes rather than regrowth lines | Higher early on until grey catches up |
| Damage risk | Minimal | Moderate, since lifting stresses strands |
Conclusion
Transitioning to grey hair with highlights is more than a style choice; it’s a process that balances technique, base color, and maintenance.
Each technique, from babylights to French blending, works differently to manage contrast and tonal noise, so selecting the right method based on grey percentage and growth rate ensures a smooth, low-maintenance transition.
Proper at-home care and timing further support a seamless blend. By understanding these principles, you can achieve a natural, intentional-looking grey without high upkeep.
Have you tried transitioning to grey with highlights? Share your experience or suggestions in the comments below!
Frequently Asked Questions
Can I Transition to Grey at Home, or Should It Always Be Done by A Professional?
Professional Application Ensures Even Highlights and Safe Processing; At-Home Attempts Risk Uneven Color, Over-Processing, and Damage.
How Long Does It Typically Take to Fully Transition to Grey Hair with Highlights?
The transition usually takes several months, depending on the grey percentage, hair growth rate, and chosen highlighting technique.
Will Highlights Damage My Hair While Transitioning to Grey?
Lightening Can Stress Hair; Deep Conditioning, Low-Volume Developers, and Professional Techniques Minimize Breakage and Maintain Health.