
You’ve seen the photos: a drop fade haircut with the curve dipping behind the ear and sweeping toward the neckline, sculpted rather than just cut.
Then you try one yourself, and that same curve becomes the reason you’re googling “how to fix uneven fade” at midnight.
It’s one of the most requested cuts out there, and one of the easiest to botch. Not because the tools are hard to use, but because the technique behind that curve rarely gets explained.
Most tutorials show you the finished look and skip the part that matters most. How that drop actually gets built is what you’re about to learn, step by step.
What Is a Drop Fade Haircut?
A drop fade is a modern take on the classic fade: the line curves downward behind the ear toward the neckline, instead of staying straight.
This curve follows the natural contour of the skull instead of cutting across it flatly. The result is a fade that looks sculpted to the head, not mechanically even.
Because of this dip, a drop fade often looks more dynamic and balanced than a standard fade, adding definition around the jaw and neckline.
It also demands more precision, since the barber has to track the curve accurately. Done well, it gives a clean, sculpted profile.
What You Need Before You Start?
Before diving into a drop fade, it helps to have the right setup on hand. A few key tools make the process smoother and the final result much cleaner.
| Tool | Purpose |
|---|---|
| Clippers with a Taper Lever | Blends lengths without swapping guards |
| Guard Combs (0-3) | Higher for bulk, lower for a tight neckline |
| Trimmer | Sharp edges around hairline and neckline |
| Comb | Keeps sections even, unevenness easy to spot |
| Cape | Keeps hair off your clothes |
| Mirror | Lets you check the back of the cut |
Having these tools ready before you begin sets you up for a cleaner, more controlled cut. With everything in place, you’re ready to start shaping the fade.
How to do a Drop Fade Haircut Step by Step?
Follow these steps in order, take your time with each one, and check your progress often. That’s what turns a rough attempt into a sharp, finished fade:
Step 1: Set the Drop Fade Line
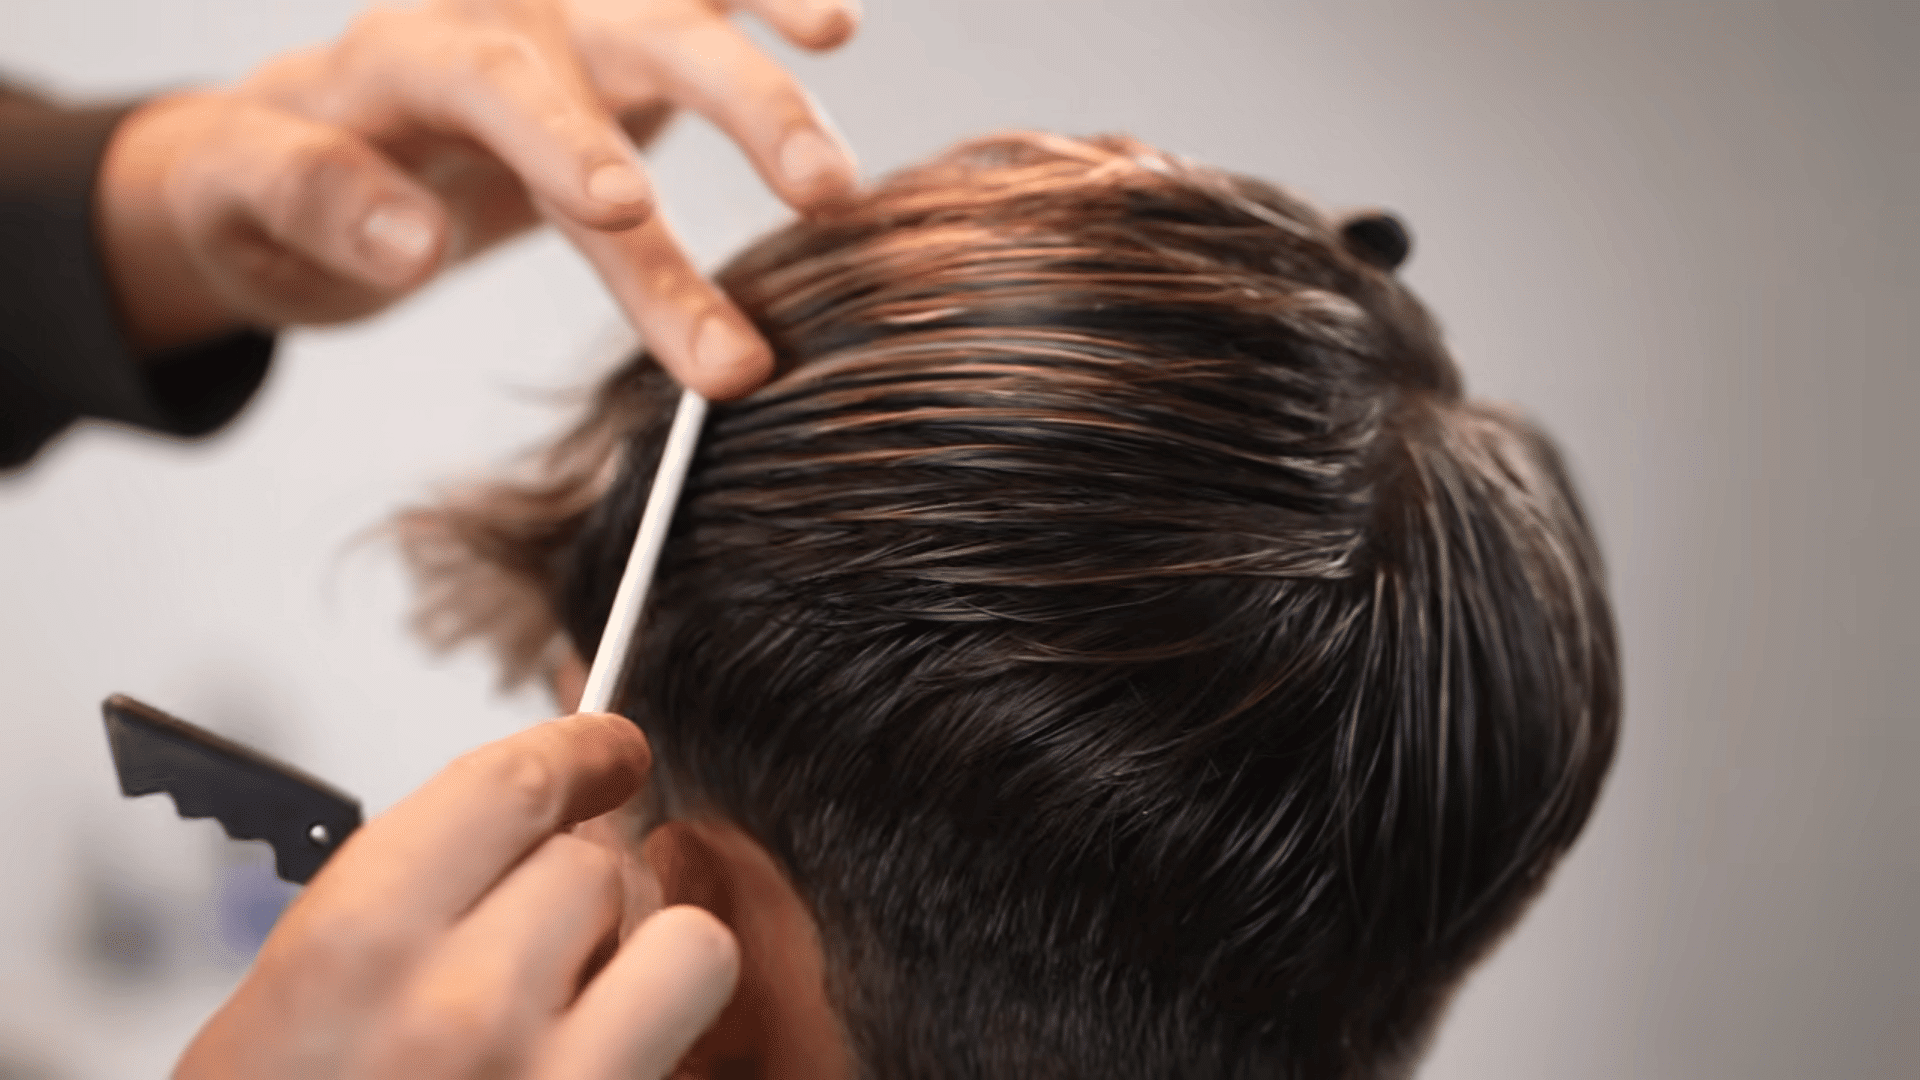
Start by preparing the hair, clipping away the top section, and creating clean sections for better control.
Use a trimmer to create the mid-drop fade baseline, curving it around the sides and lowering it toward the back to achieve the signature drop shape.
Step 2: Remove Bottom Hair and Clean Up
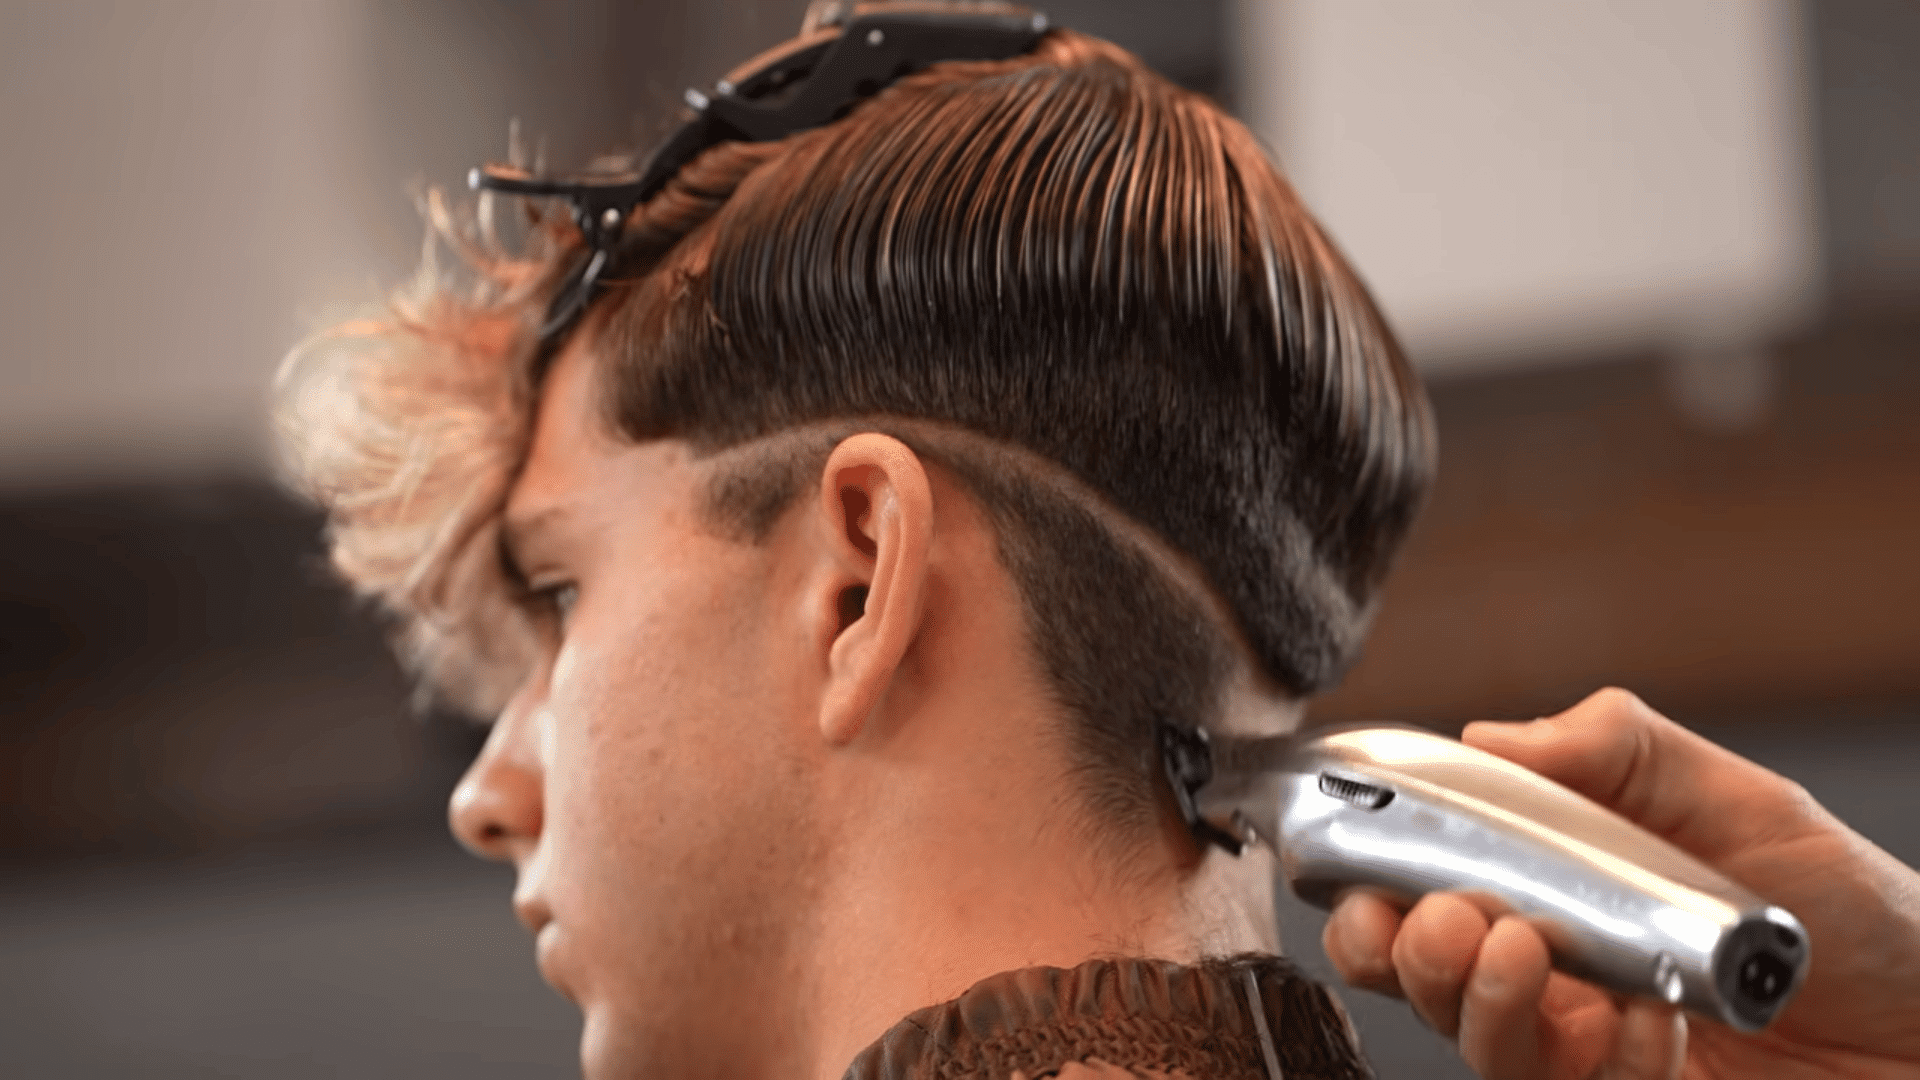
Use the trimmer to remove the hair beneath the baseline, carefully working around the neck and ears where the skin curves and the risk of nicking is higher.
After removing the bulk, use a shaver to clean up any leftover stubble and flick outward near the baseline for a smoother transition into the next stage.
Step 3: Build the Fade With Guards
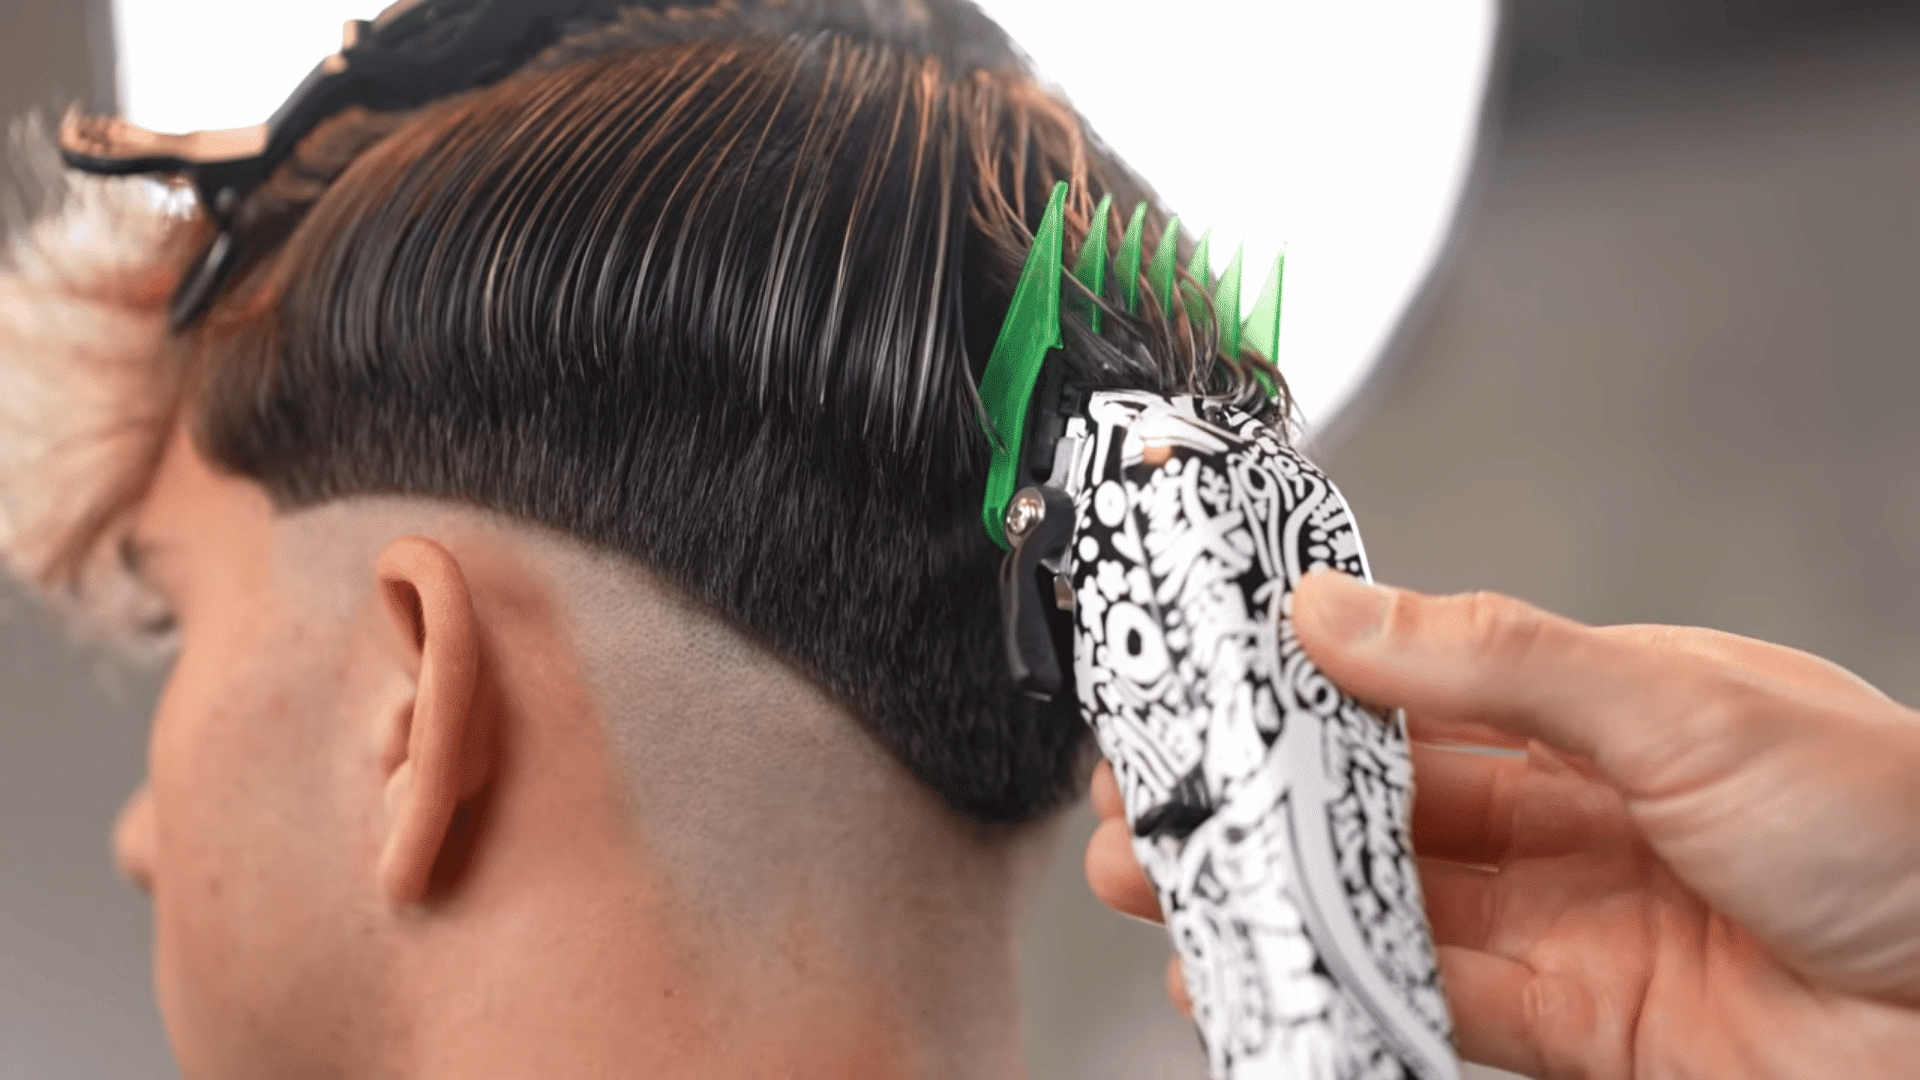
Begin removing bulk with a number 3 guard, then work upward using progressively smaller guard sizes to build the fade blend from the bottom up.
Use the open lever, one guard, one and a half guard, and half guard, making light, controlled flicking motions with each pass to soften every line rather than leaving a hard edge.
Step 4: Detail and Refine the Fade
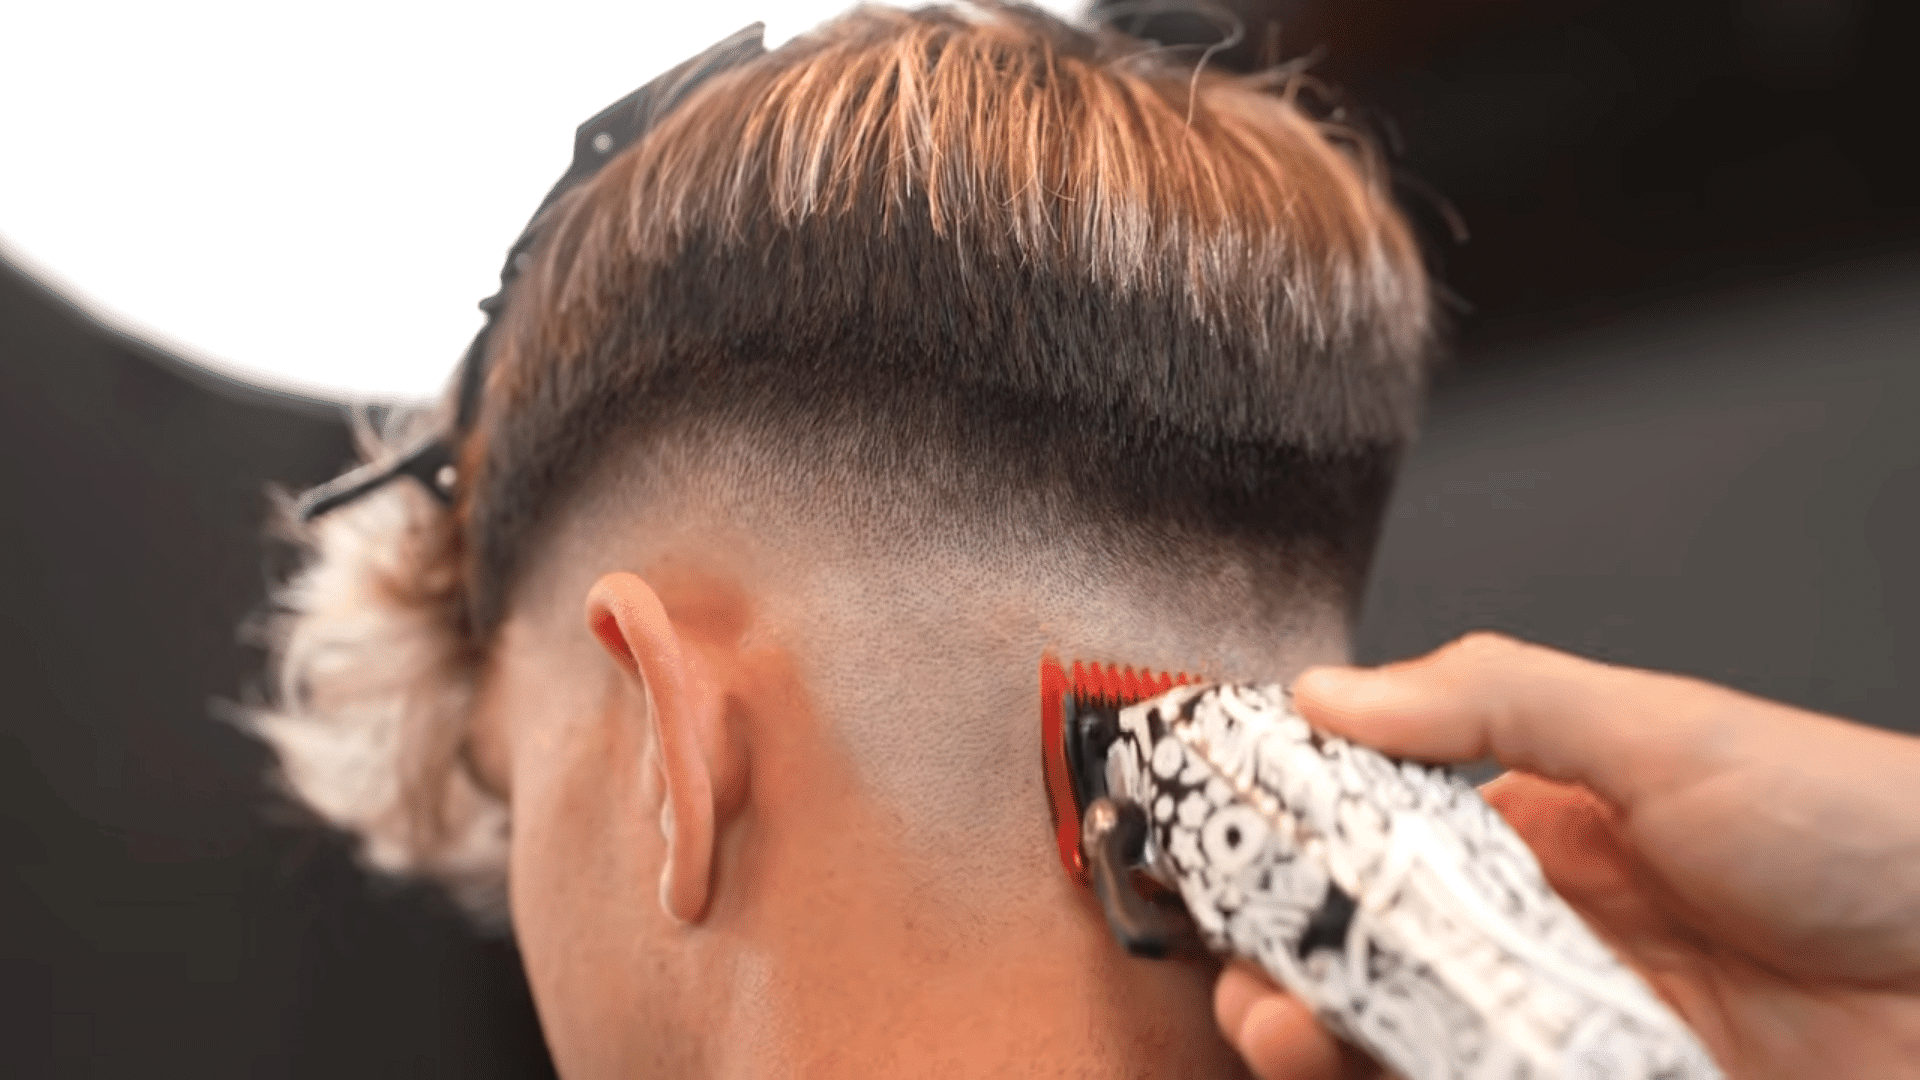
Go back through the fade and remove any dark or blocky areas by adjusting the lever and using the clipper corners for more precise control.
Finish refining the blend with recutting techniques and blending shears to reduce extra weight while keeping the shape balanced and natural.
Step 5: Cut and Style the Top Hair
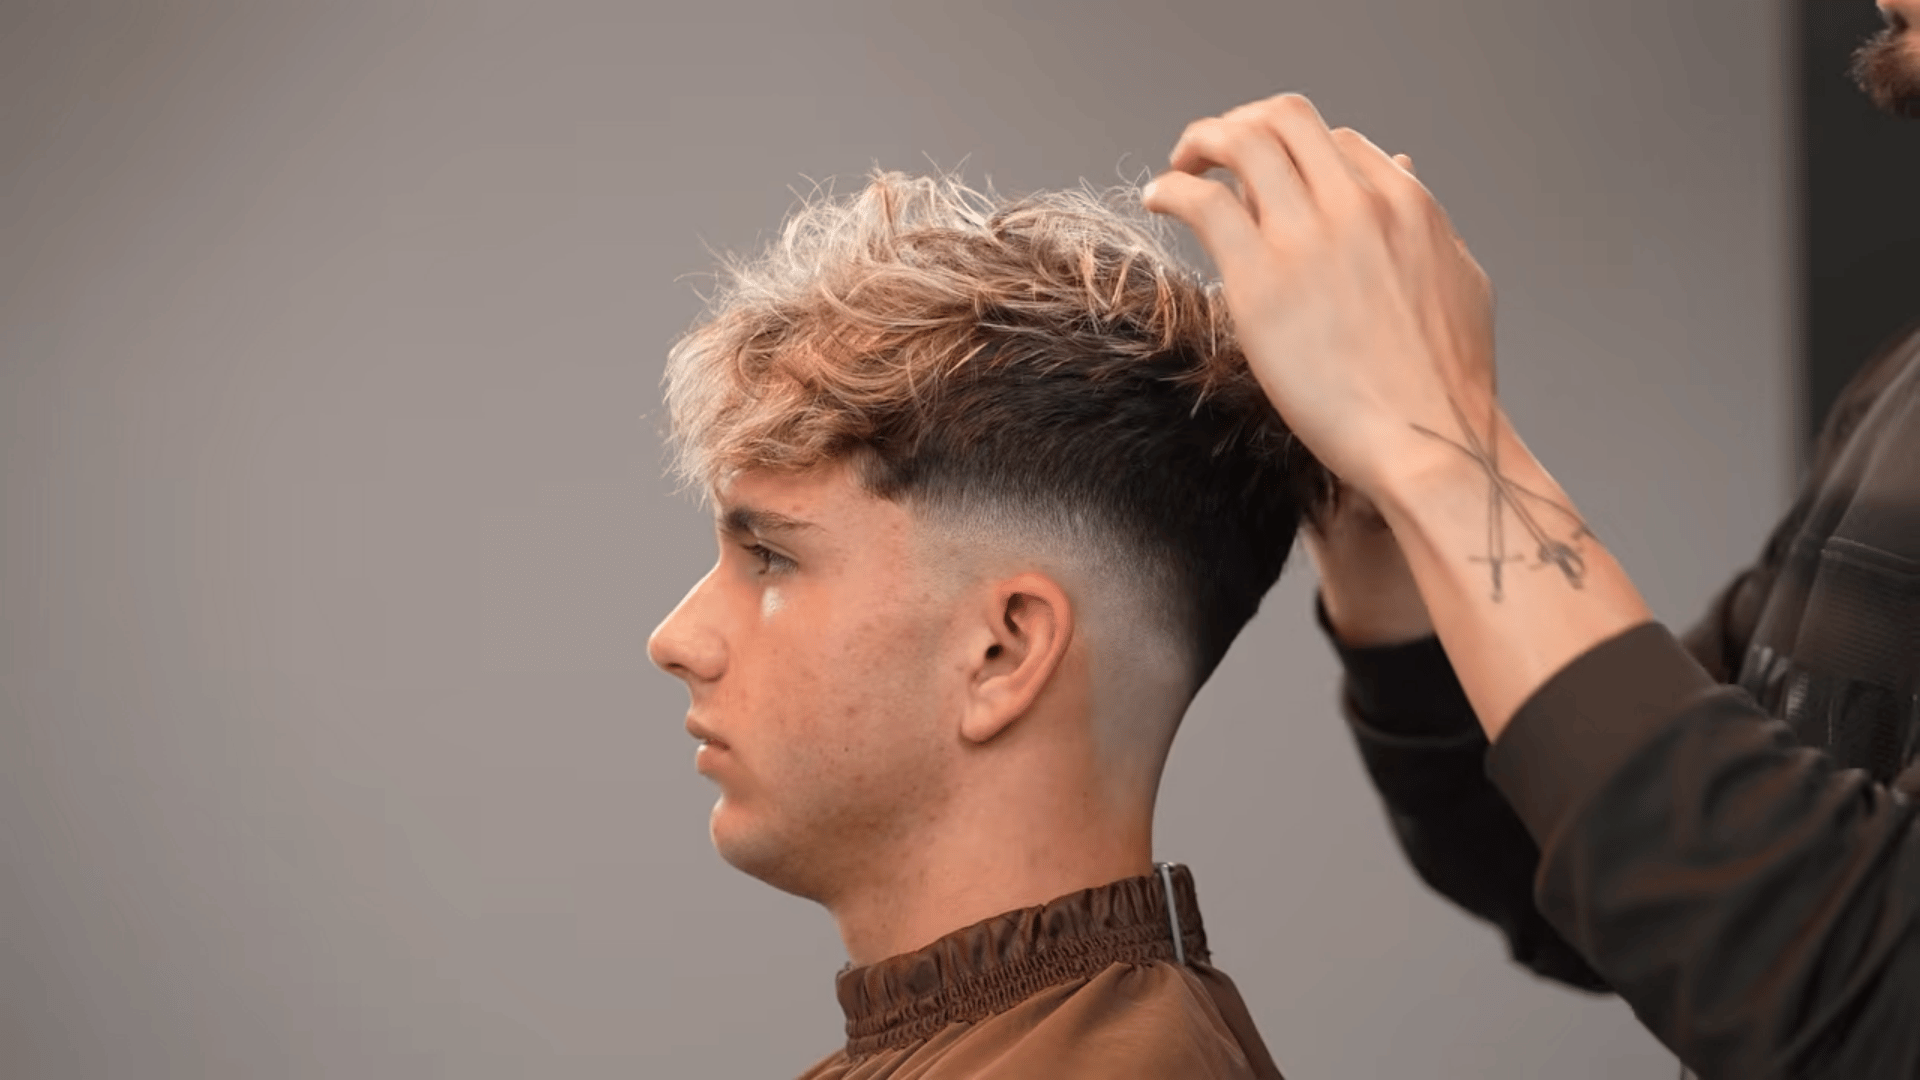
Create a horseshoe section on top, establish the base length you want to keep, and remove unnecessary weight from the front section so it doesn’t overpower the fade.
Use point cutting and razor techniques to add texture and movement, then apply a matte clay to pull it all together into a natural, slightly messy finish.
Common Mistakes That Ruin a Drop Fade
A drop fade goes wrong in a few predictable spots, and most of them share the same root problem: there’s no way to add hair back once it’s cut.
A single misjudged angle can throw off the whole shape. Knowing where things fall apart makes mistakes easier to catch early.
- Uneven curves behind each ear can make the haircut look unbalanced.
- An incorrect drop point may require adjusting the other side for a matching shape.
- A visible line between different lengths can make the haircut look uneven and may need blending
A small error early on rarely stays small; it usually ends in a shorter, more drastic cut than planned. What starts as a minor slip usually ends in a shorter, more drastic cut than you’d planned.
Can Beginners Actually Do a Drop Fade?
Yes, but it takes patience more than skill to get right. It’s forgiving for someone willing to go slow, and unforgiving for someone rushing through the curve.
Beginners mostly struggle with judging the curve behind the ear and blending guard sizes evenly. A longer guard gives more room for error early on.
The first attempt is rarely clean, and that’s completely expected. Most people need a few practice tries before the curve starts looking consistent and natural.
Conclusion
A drop fade haircut comes down to two things: a reliable guideline and patience on the curve behind the ear. Skip either, and the rest of the cut suffers for it.
Get those two right, and everything else- the edges, the top, the final connection falls into place far more easily.
Your first try won’t be perfect, and that’s completely normal. Take it slow, check both sides often, and let the technique sharpen with practice.
Take your time with the baseline and blend work. A clean drop fade comes from patience, practice, and checking your progress often.
Already tried cutting your own drop fade? Share your experience in the comments below.
Frequently Asked Questions
How Long Does it Take to Learn a Drop Fade on Your Own?
Most beginners need several practice attempts before the curve looks consistent. Expect 3 to 5 tries on yourself or a willing friend before it feels natural.
Can You Fix a Drop Fade that’s Too High without Starting Over?
Not really. Once the drop point is set too high, the only fix is matching the rest of the cut to it, which usually means going shorter overall.
Do You Need Different Clippers for a Drop Fade versus a Regular Fade?
No, the same clippers work for both. The difference comes from technique and clipper angle, not the tool itself.