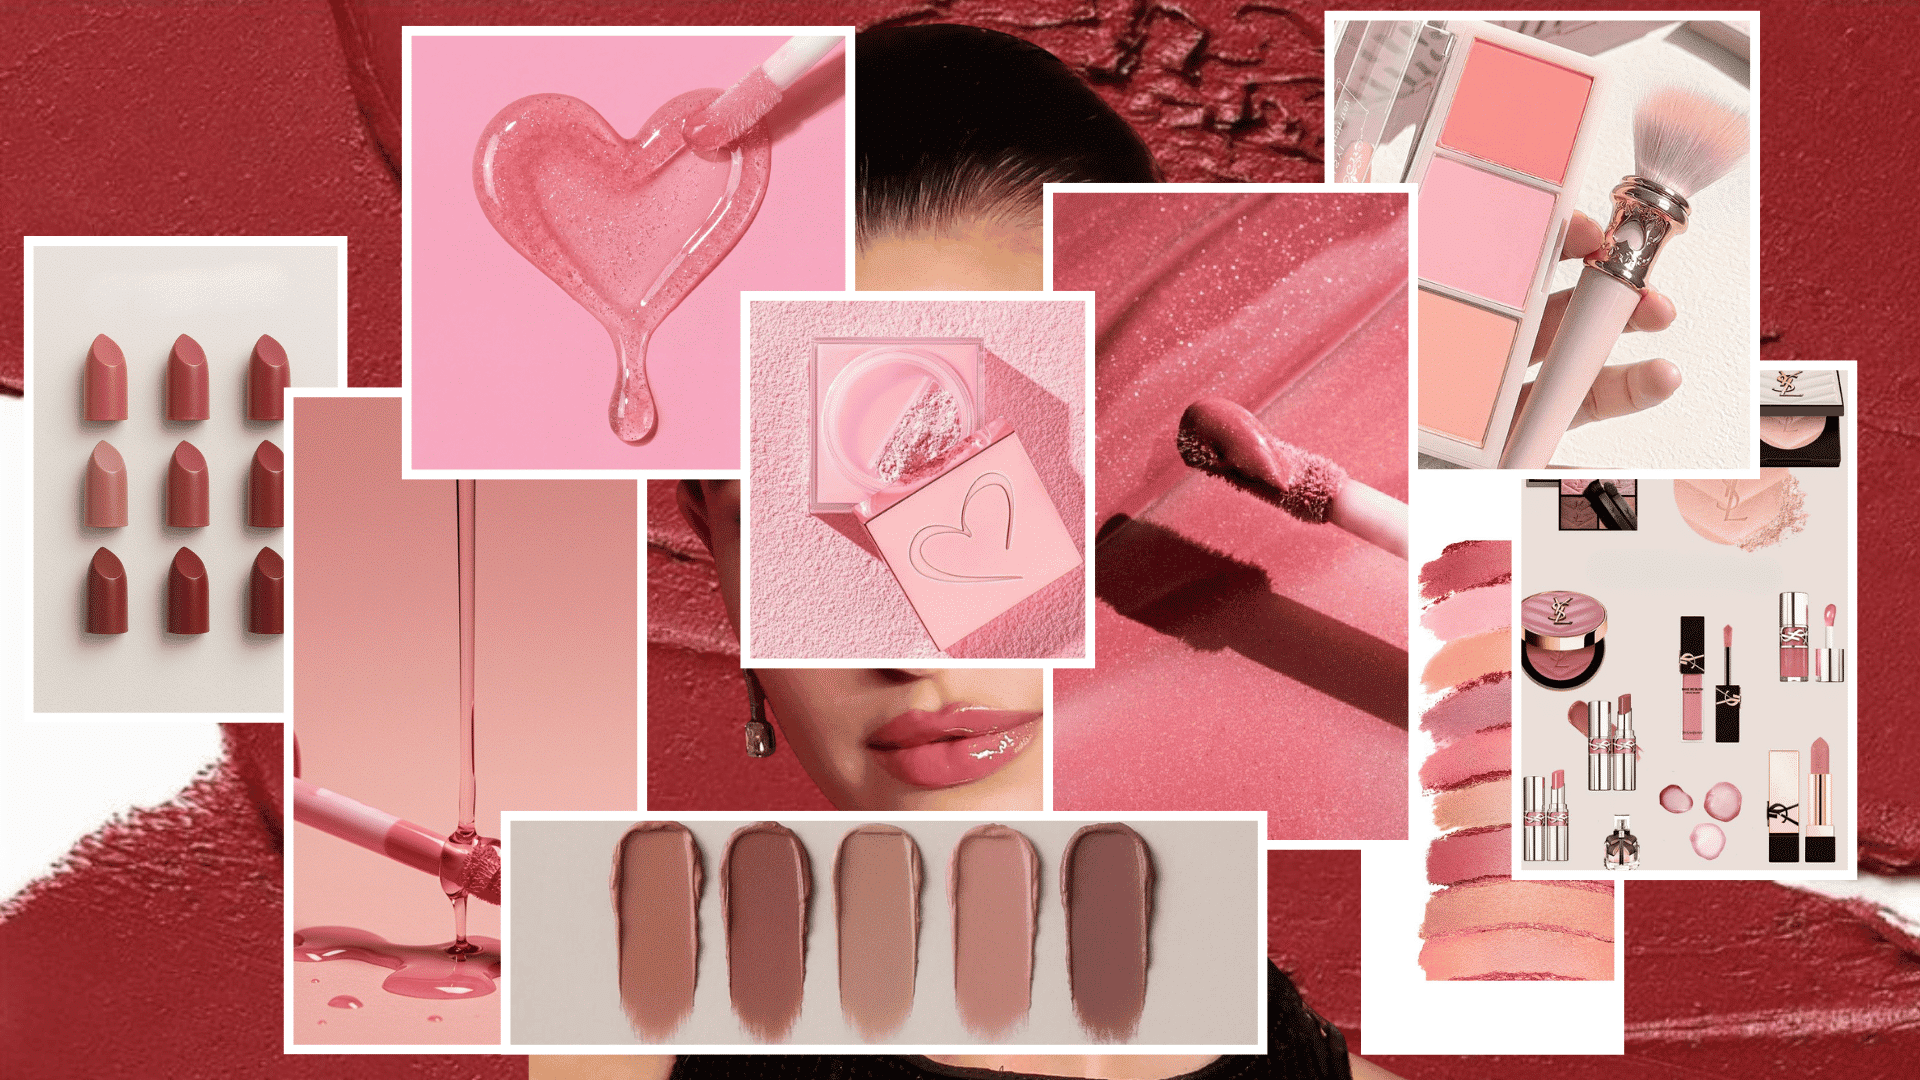


Ever stood in front of a mirror with makeup products everywhere and still wondered what goes first? A simple order can make how to do makeup feel far less confusing and help each product work better.
A beginner routine does not need endless products or complex techniques. Skin prep, a light base, subtle color, defined eyes, and comfortable lips can create a polished everyday look.
Each step has a purpose, making makeup easier with the right products, placement, and amount. Small blending habits can also create a noticeable difference.
The goal is not perfect makeup on the first try. It is building a comfortable routine that suits your features and becomes quicker with practice.
Everything You Need Before You Start Your Makeup
Here’s a complete list of what to have on hand before you begin:
-
Facial cleanser
-
Moisturizer
-
Sunscreen (SPF 30+)
-
Primer
-
Foundation or skin tint
-
Concealer
-
Setting powder
-
Bronzer
-
Blush
-
Brow pencil or powder
-
Brow gel
-
Eyeshadow
-
Mascara
-
Lip liner
-
Lipstick, gloss, tint, or lip oil
-
Setting spray
-
Makeup sponge or blending brush
-
Brush set
-
Mirror with good lighting
-
Tissues
-
Makeup remover
Skin Preparation: Before Makeup Application

Skin preparation is the step that decides how makeup wears throughout the day. Even high-quality products can look uneven when the base underneath is not ready.
A thoughtful prep routine helps makeup sit naturally, reduces the need for extra layers, and creates a more comfortable finish from morning to night.
Step 1: Cleanse Your Face
Start with a gentle cleanser to remove oil, sweat, and leftover skincare. Clean skin lets makeup sit smoothly without looking uneven.
Avoid using harsh cleansers that can strip natural moisture and leave your skin feeling tight. A fresh base helps make makeup application more comfortable.
Step 2: Moisturize Your Skin
Apply moisturizer evenly across your face to keep your skin hydrated and balanced. Let it absorb fully before moving to the next makeup step.
The right moisturizer, paired with a steady morning skincare routine, helps prevent dry patches and keeps foundation from separating. Select a formula that works well with your skin type.
Tip: Let moisturizer absorb fully before applying makeup to prevent patchiness.
Step 3: Apply Sunscreen
Use a broad-spectrum SPF 30 or higher to protect your skin from harmful UV exposure. Dermatologists recommend broad-spectrum sunscreen with SPF 30 or higher as part of daily skin protection. Apply sunscreen before makeup as part of your daytime routine.
Allow sunscreen to settle before adding other products to avoid pilling. This step keeps your skin protected while maintaining a smooth makeup base.
Step 4: Use Primer
Apply a small amount of primer to areas like the T-zone to smooth texture and blur the appearance of pores. It also creates a grip layer for makeup.
Different primers target different concerns, such as oil control, hydration, or texture. Matching primer to your skin type makes it easier to choose one that suits your needs and desired finish.
Tip: Apply primer only where needed instead of covering your entire face with excess product.
Create the Base: For Coverage

A smooth base is essential for makeup because foundation and concealer help create an even, natural-looking finish.
These products balance skin tone, provide comfortable coverage, and enhance natural features without looking heavy. Proper blending creates a polished base for the rest of your makeup.
Step 5: Apply Skin Tint or Foundation
Dot skin tint or foundation across your cheeks, forehead, and chin for even distribution. Start with a small amount, then build coverage as needed.
Select a shade that matches your skin tone for a natural appearance. Lightweight formulas often work well for everyday makeup looks for beginners.
Step 6: Blend the Base
Use a damp beauty sponge or brush to blend makeup from the center of your face outward. This technique creates a seamless, skin-like finish.
Take extra time around the jawline and hairline to avoid visible edges. Proper blending makes even simple makeup look more polished.
Step 7: Apply Concealer
Dab concealer under your eyes and over blemishes where you need extra coverage. Use a small amount to avoid a heavy, cakey look.
Select a concealer shade based on your goal, such as brightening the under-eye area for a well-rested look or covering imperfections. Focus on targeted areas rather than applying it too heavily.
Tip: Use concealer only where extra coverage is needed to prevent a heavy look.
Step 8: Blend Concealer
Let concealer sit briefly before blending to improve coverage and staying power. Gently tap the product with your finger, sponge, or brush.
Avoid rubbing the concealer away while blending around delicate areas. Soft tapping helps maintain coverage while creating a natural finish.
Add Color and Dimension: For Facial Definition
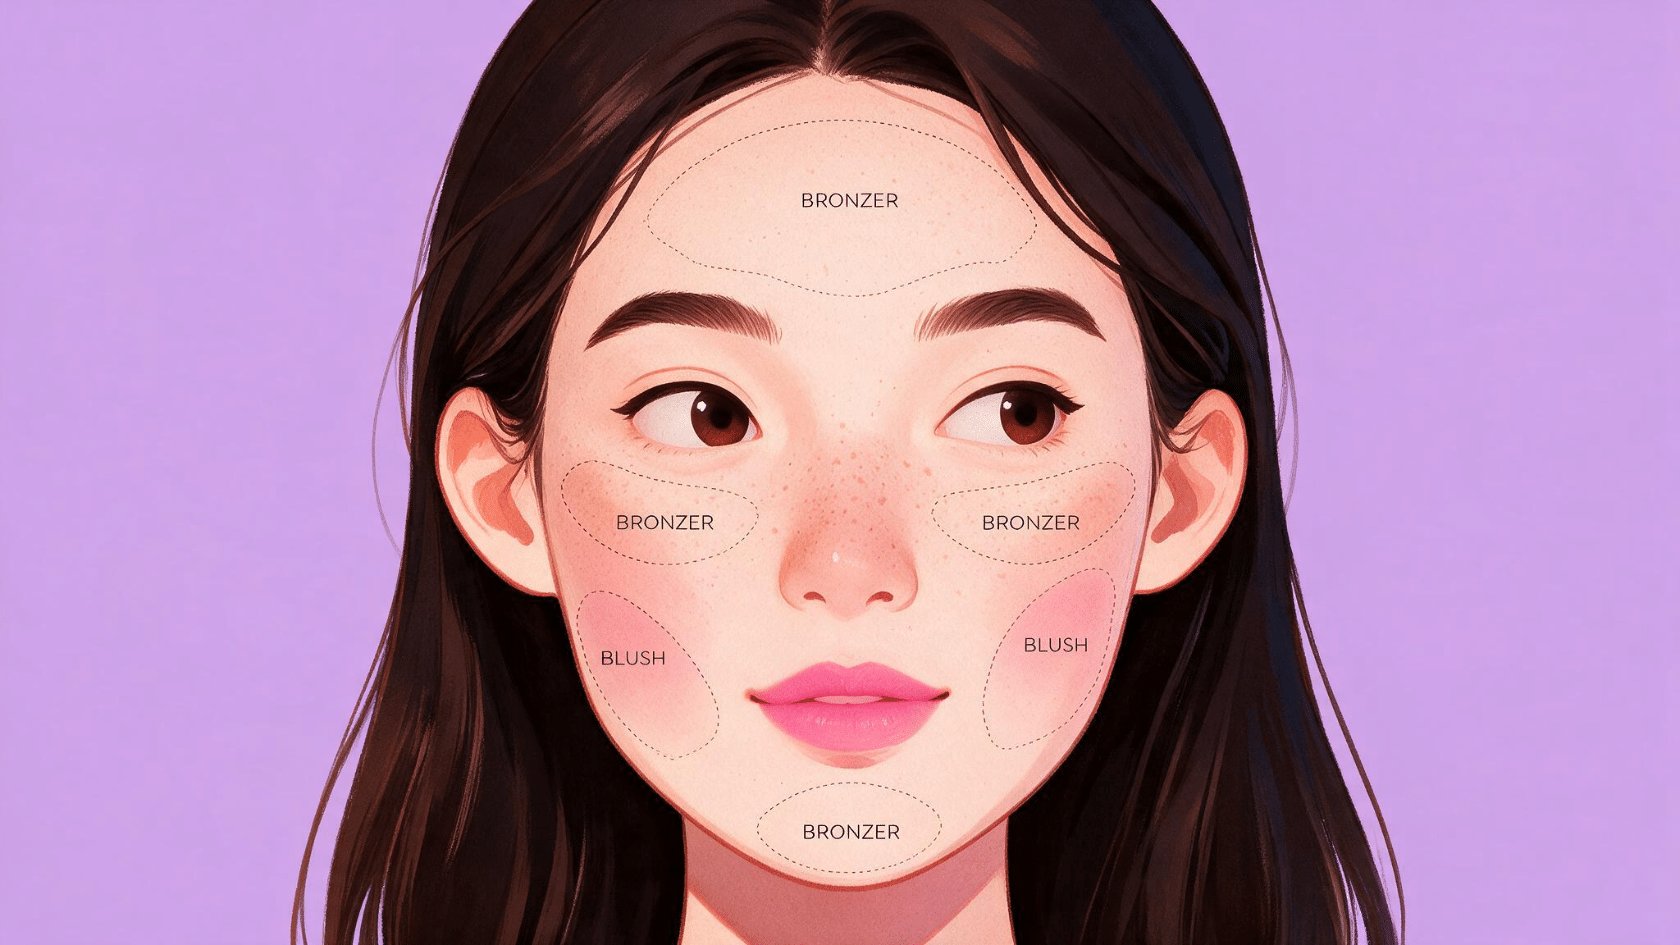
Foundation can soften natural shadows, so adding color brings warmth and definition back to your face. These steps create a fresh and balanced makeup look.
Step 9: Apply Bronzer
Sweep bronzer across the forehead, cheekbones, and jawline to add warmth and subtle shape. Blend carefully to avoid harsh lines or uneven patches.
Cream and powder bronzers can both work well depending on your preferred finish. Use a light hand and build intensity gradually.
Step 10: Add Blush
Apply blush to the apples of your cheeks and blend upward toward your temples. This creates a healthy flush and a lifted appearance.
Select shades that complement your skin tone and makeup style. A small amount can add noticeable freshness to your overall look.
Step 11: Apply Setting Powder
Press translucent powder onto areas that crease or become oily, such as the under-eyes and T-zone. This helps control shine and improves makeup wear.
Avoid applying too much powder, as it can make skin appear dry. A light layer keeps the finish smooth and natural.
Tip: Focus powder on oily areas instead of applying it heavily across the entire face.
Define Your Eyes and Brows

Eye makeup adds structure and enhances your facial features without requiring complicated techniques. Simple steps can create a polished everyday appearance.
Step 12: Shape Your Brows
Brush brow hairs upward and fill sparse areas using short, hair-like strokes to build natural-looking definition. Since there are different types of eyebrows, from thin and straight to naturally fuller arches, work with your brow’s own shape rather than forcing a dramatic change.
Avoid making brows too dark or overly shaped for an everyday look. Small adjustments can make a noticeable difference in how your face is framed while keeping your brows looking soft.
Tip: Fill brows with light strokes to create a softer, more natural finish.
Step 13: Apply Brow Gel
Use brow gel to hold hairs in place after filling and shaping your brows. It helps maintain the look throughout the day.
Clear or tinted brow gels can add different levels of definition. Select one based on how natural or bold you want your brows to appear.
Step 14: Add Eyeshadow
Apply a neutral shade across your eyelids for simple depth and definition, adjusting placement slightly based on your eye shape. Soft brown or taupe shades work well for beginner-friendly looks.
Blend the edges carefully to avoid harsh lines and create a smoother finish. Simple eyeshadow techniques can enhance your eyes without extra effort.
Step 15: Apply Mascara
Place the mascara wand at the lash roots, gently wiggle, and sweep upward toward the tips. This technique adds length and volume.
Apply additional coats only if needed to avoid clumping. Mascara instantly enhances the eyes and completes a simple makeup look.
Tip: Avoid too many mascara layers to prevent clumping and keep lashes defined.
Enhance Lips and Set Makeup

The final steps add color and help complete your makeup look. Lip products and setting spray can improve the overall finish and longevity.
Step 16: Apply Lip Liner
Trace your natural lip shape with a liner to define the edges and create a clean base. It also helps prevent lip products from spreading.
Select a shade close to your natural lip color for an everyday appearance. A light application creates definition without looking too dramatic.
Step 17: Add Lip Color
Apply lipstick, gloss, tinted balm, or lip oil to finish your makeup look, or try a homemade lip gloss for extra customization. Select a formula that feels comfortable and suits your style.
You can layer products to create different finishes, from natural to more defined. Blotting with a tissue can help improve staying power.
Step 18: Use Setting Spray
Hold setting spray a few inches away and mist it across your face in an X-and-T motion. This helps blend layers and extend wear.
Use setting spray based on your skin type and makeup needs. A light application can keep your look fresh without feeling heavy.
Tip: Hold setting spray at the recommended distance for an even application.
Remove Makeup and Follow Aftercare
Removing makeup correctly keeps skin clean, comfortable, and refreshed after daily product use. A simple aftercare routine helps prevent buildup and supports healthier-looking skin.
-
Use a gentle makeup remover to dissolve products without irritation
-
Remove eye and lip makeup with extra care
-
Avoid harsh rubbing to protect sensitive skin areas
-
Cleanse face after removal to clear leftover residue
-
Apply moisturizer to restore skin hydration overnight
-
Follow consistent aftercare for smoother makeup application
A proper makeup removal routine improves skin comfort and prepares your face for future looks.
Simple nighttime habits can support a fresh complexion while keeping your skin balanced and ready for makeup.
What Is the 2/3 Rule for Makeup?
The 2/3 rule in makeup means highlighting only two out of three key features: the eyes, cheeks, and lips. Keeping one area softer creates a balanced, polished look.
A makeup style looks more refined when two features receive more attention through bold colors, definition, or stronger products. The remaining feature stays subtle to avoid an overdone appearance.
A classic example is pairing bold eyes and lips with soft blush or combining bright cheeks and lips with minimal eye makeup. This creates harmony across the face.
The 2/3 makeup rule helps create intentional looks by balancing different facial features. It works for everyday makeup and more dramatic styles.
Makeup Tips by Skin Type and Color
Your skin type and skin color can influence which makeup products feel comfortable and which shades look balanced.
Use the table below as a simple starting point for selecting suitable formulas and tones for an everyday makeup routine:
|
Skin Type |
Suitable Makeup Approach |
Skin Color |
Suitable Shade Direction |
|
Dry |
Hydrating, creamy formulas |
Fair |
Light pink, peach, soft rose |
|
Oily |
Lightweight, oil-control formulas |
Light |
Peach, warm pink, soft coral |
|
Combination |
Balanced, lightweight formulas |
Medium |
Rose, mauve, warm peach |
|
Normal |
Most formulas work well |
Tan |
Terracotta, bronze, warm rose |
|
Sensitive |
Fragrance-free, gentle formulas |
Deep |
Berry, plum, rich coral |
Your skin type helps guide the texture and finish of makeup, while skin color helps narrow down flattering shades. Testing products in natural light can make it easier to choose tones that blend naturally with your complexion.
Wrapping Up
A simple approach to how to do makeup helps beginners create a fresh, polished look without feeling overwhelmed. The right routine saves time while improving confidence through consistent practice.
A balanced method focuses on suitable products, smooth application, and techniques that match personal preferences. Small improvements in blending and product use can make everyday makeup easier and more effective.
A personalized routine allows room for creativity while keeping the process simple and enjoyable. Gradual progress helps you build skills, experiment with styles, and achieve comfortable results.
Share your favorite makeup tips in the comments below. Try these steps today and create a confident everyday makeup look with ease.
Frequently Asked Questions
How Does Gen Z do Makeup?
Gen Z makeup often focuses on a fresh, natural finish with lightweight base products, defined brows, blush, glossy lips, and subtle eye makeup. Many also personalize looks with bold colors, graphic details, or creative trends.
How Long Does Beginner Makeup Usually Take?
A beginner makeup routine usually takes 10 to 20 minutes, depending on the number of steps. With regular practice, application becomes faster, smoother, and easier.
Should Makeup Brushes Be Cleaned After Every Use?
Makeup brushes don’t need to be cleaned after every use, but regular washing is important. Clean brushes prevent buildup, improve application, and help maintain better skin hygiene.